How to Apply for Swami Vivekananda MCM Scholarship
Steps to be followed to apply online for Swami Vivekananda Merit Cum Means Scholarship
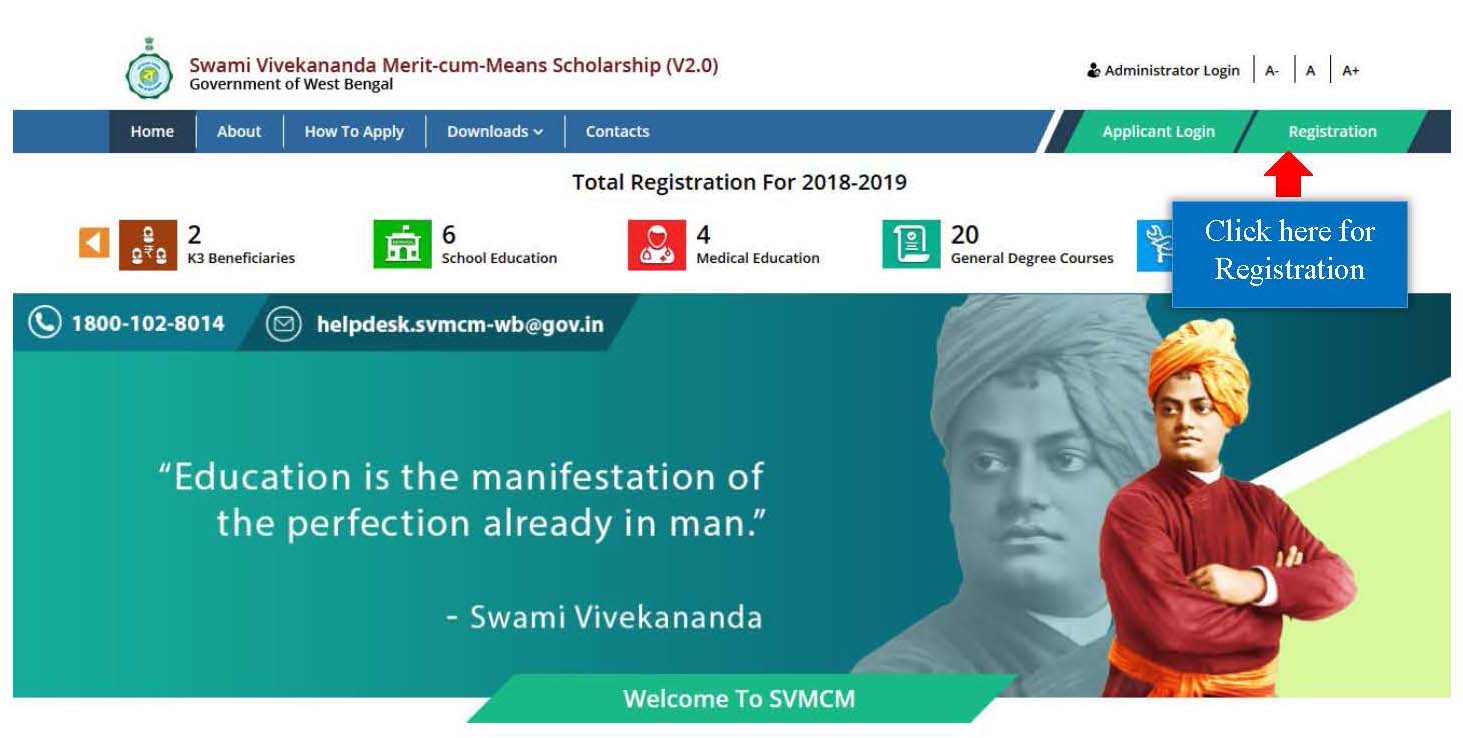
Step 1: Open the home page of e-Governance portal for Swami Vivekananda Merit Cum Means Scholarship (https://svmcm.wbhed.gov.in) in any browser and click on Registration option on the right side of the menu.
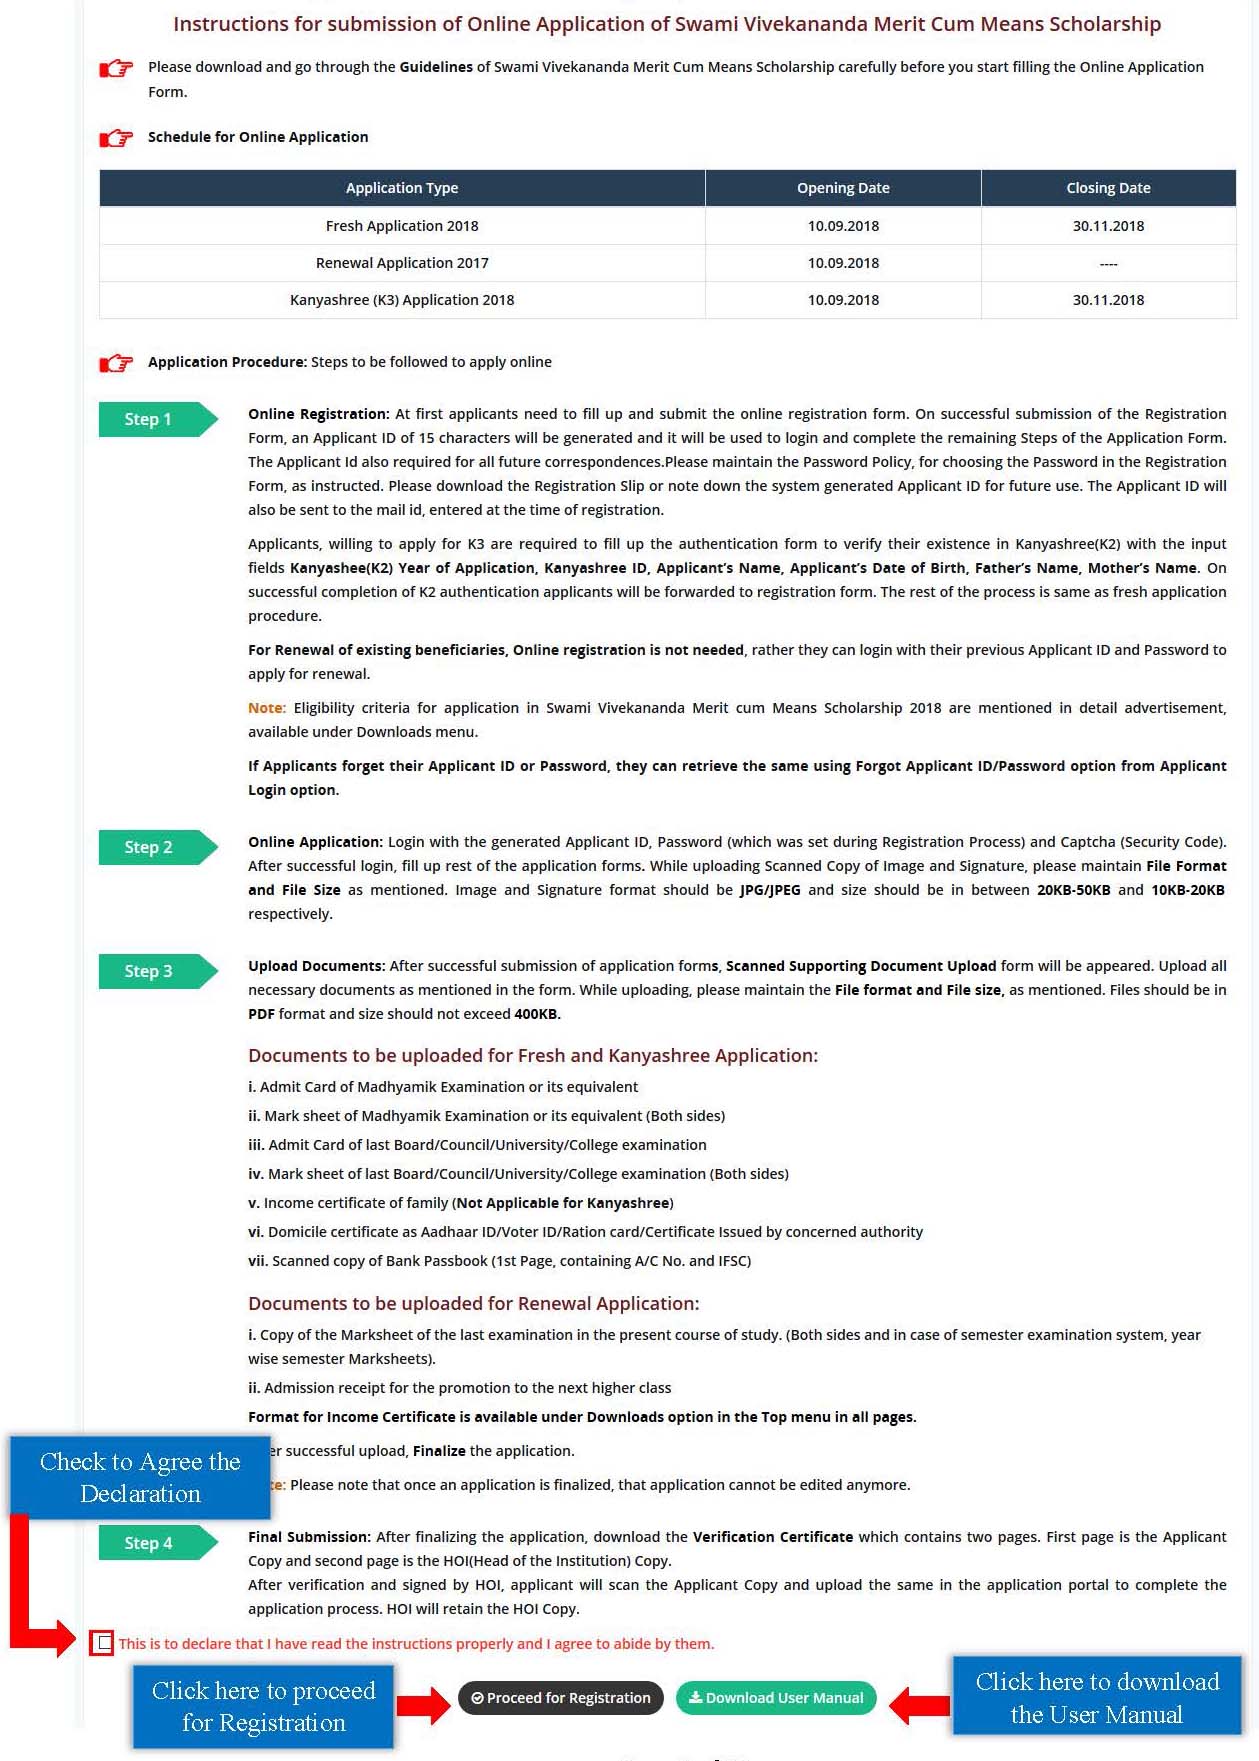
Step 2: Please download the operation manual before proceeding for registration, by clicking on Download User Manual button and also read the Instructions given in the page. After that click on the checkbox to agree terms and then Proceed for Registration.
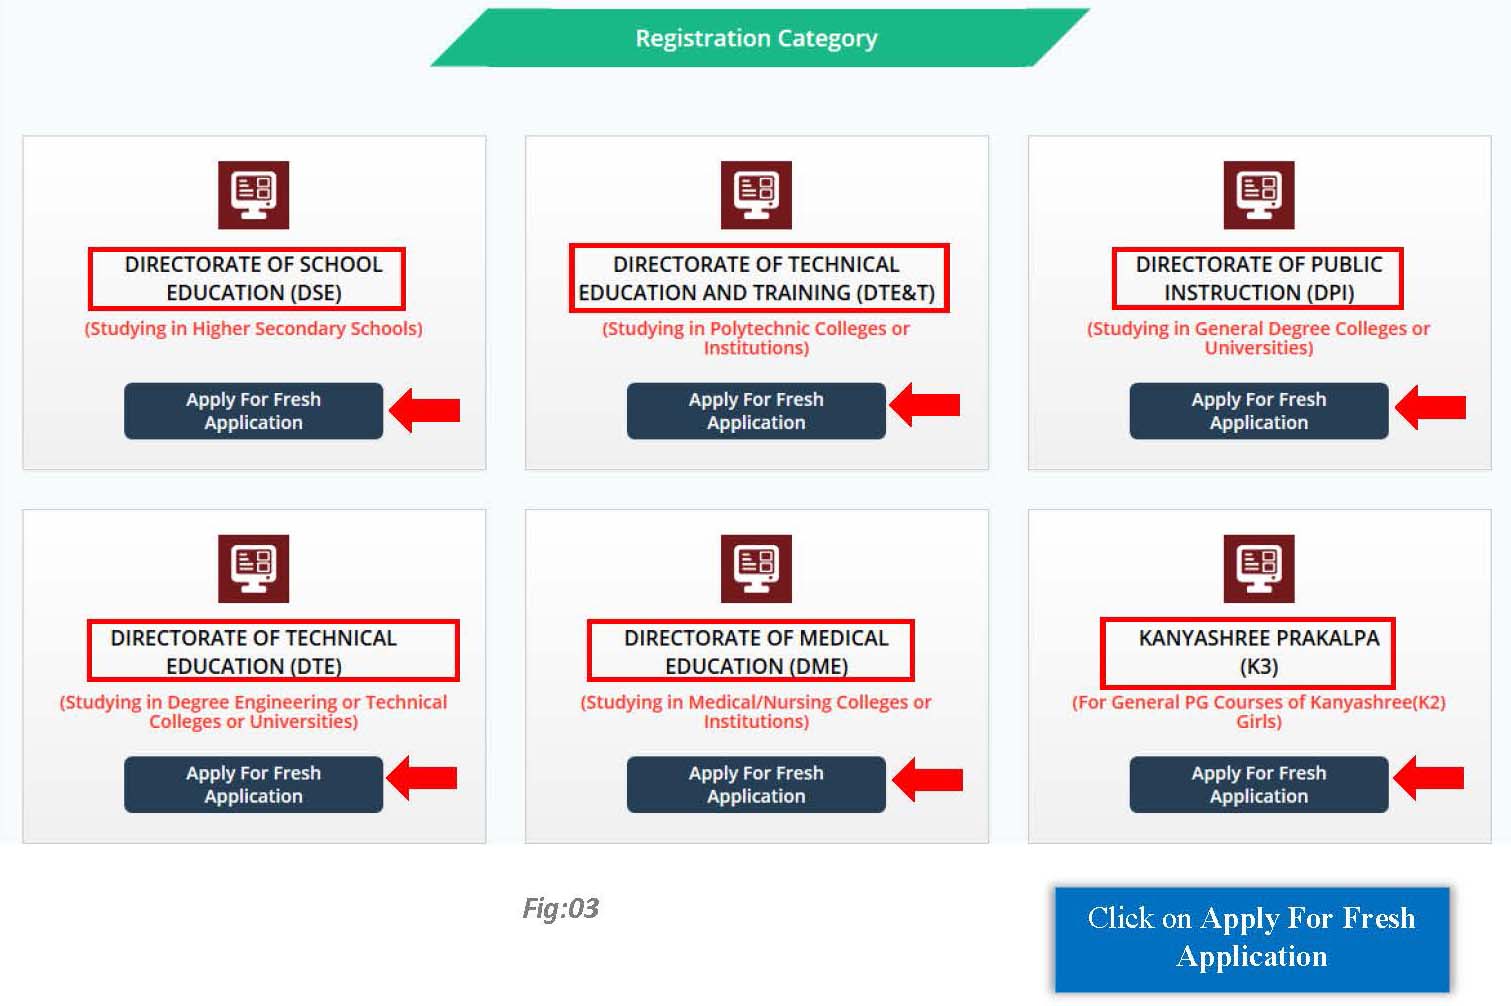
Step 3: Choose appropriate Directorate and then click on Apply for Fresh application.
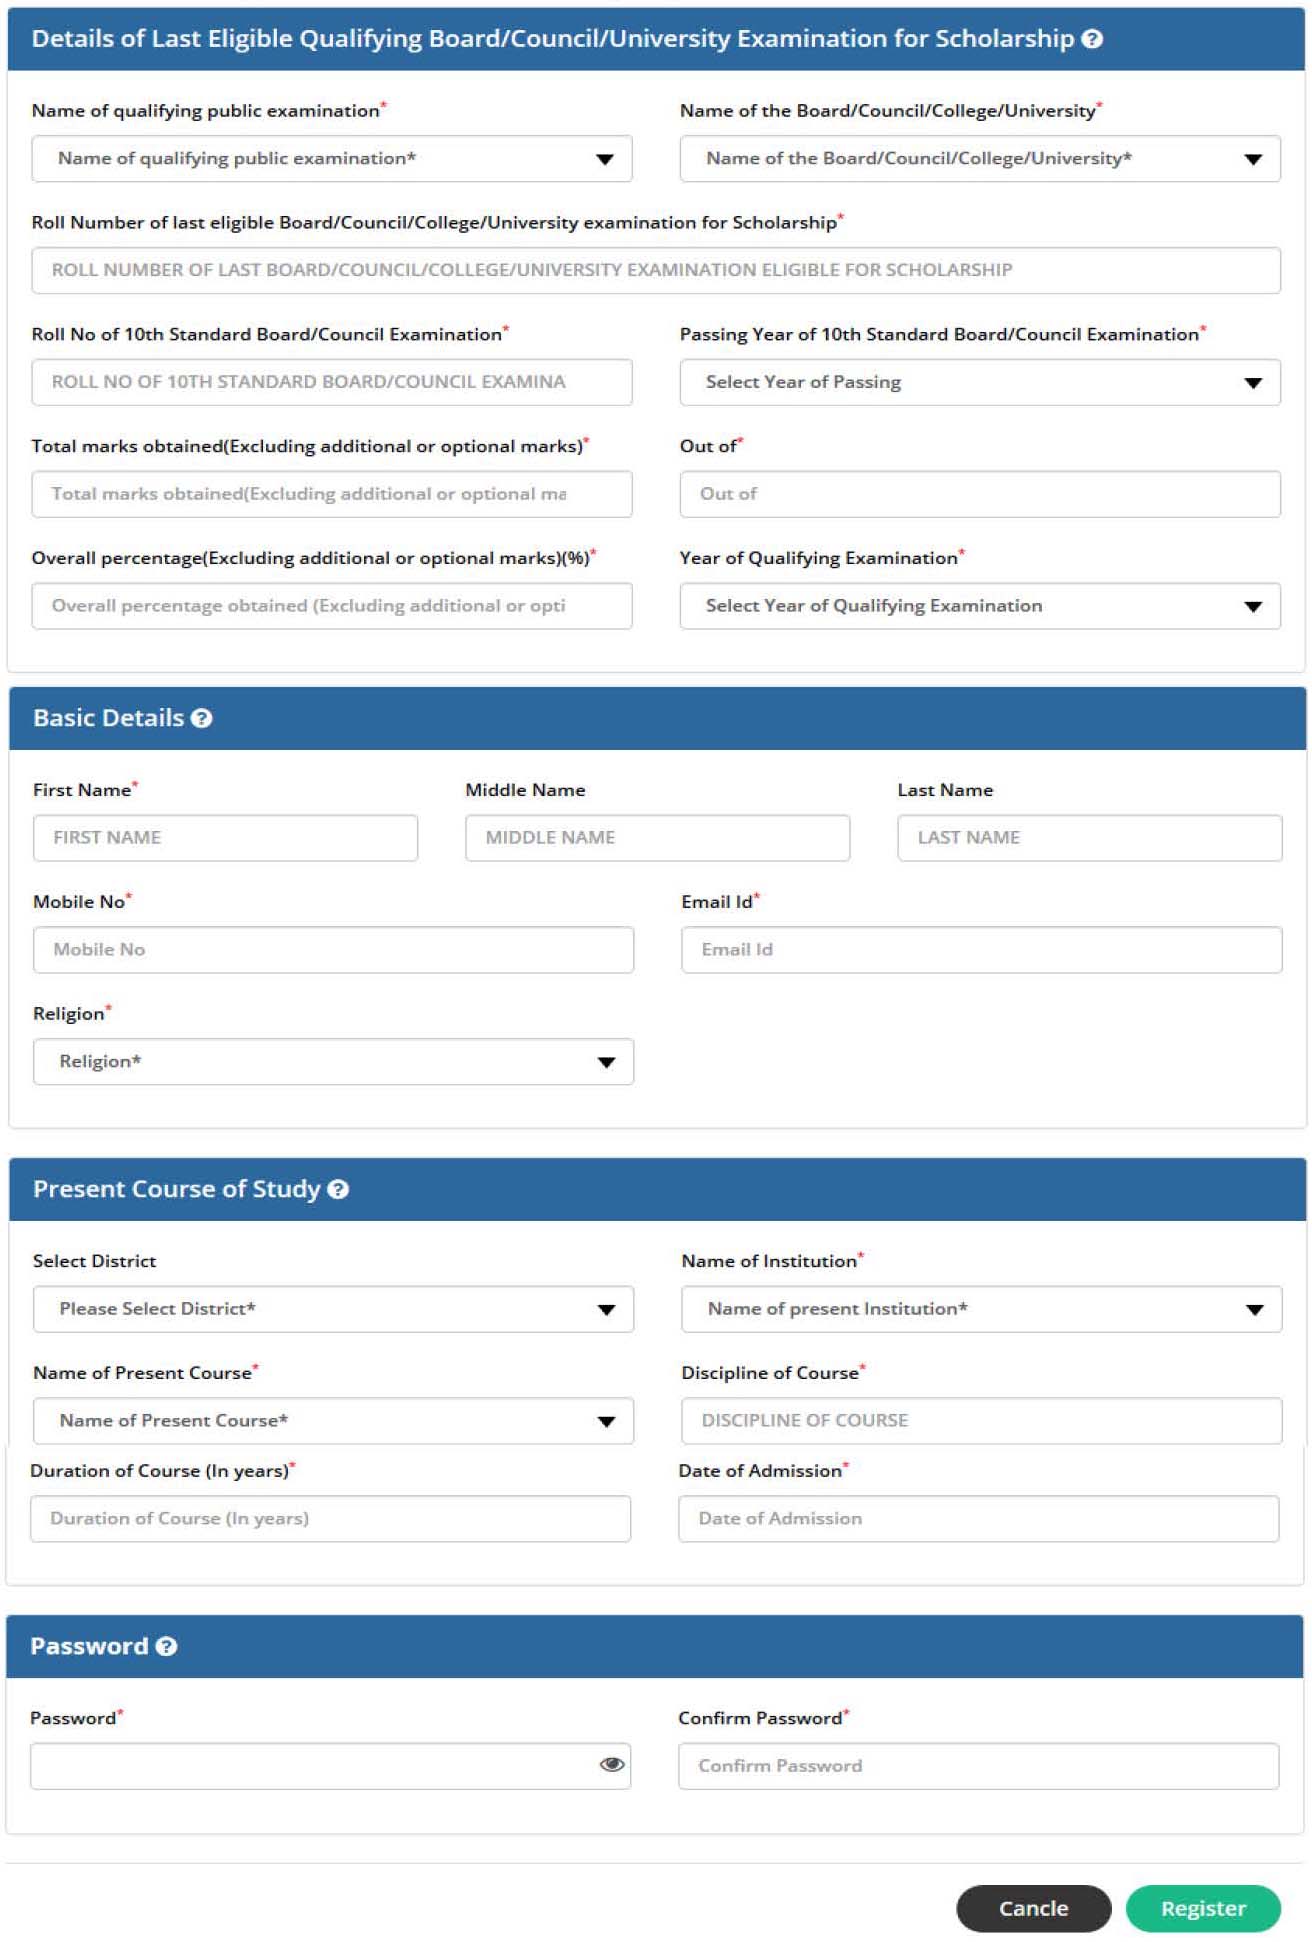
Step 4: Online Registration:
Fresh Application Process:
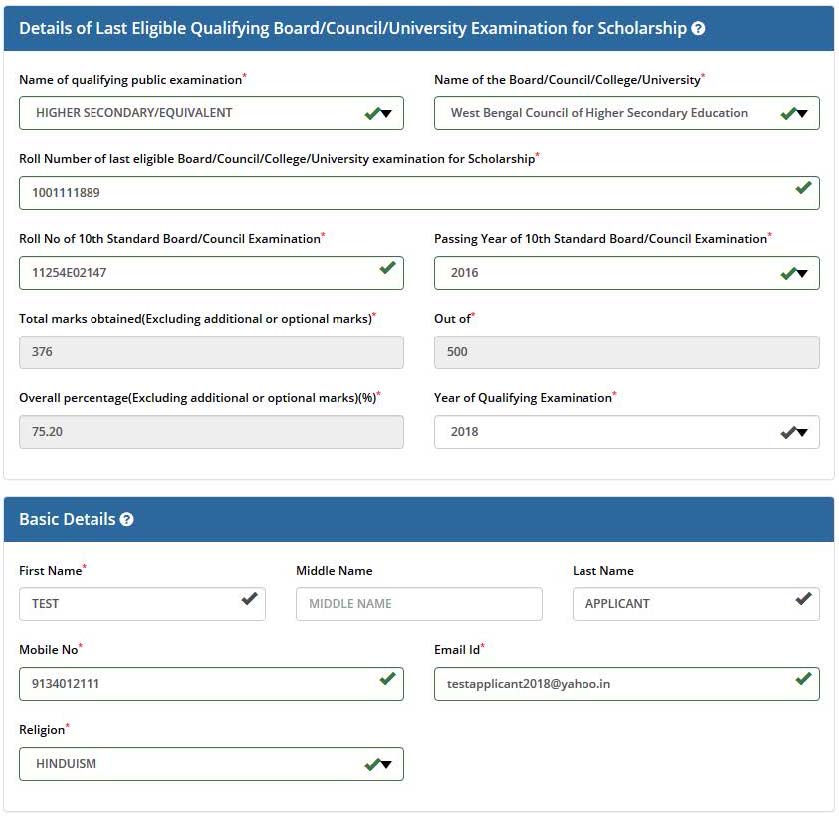
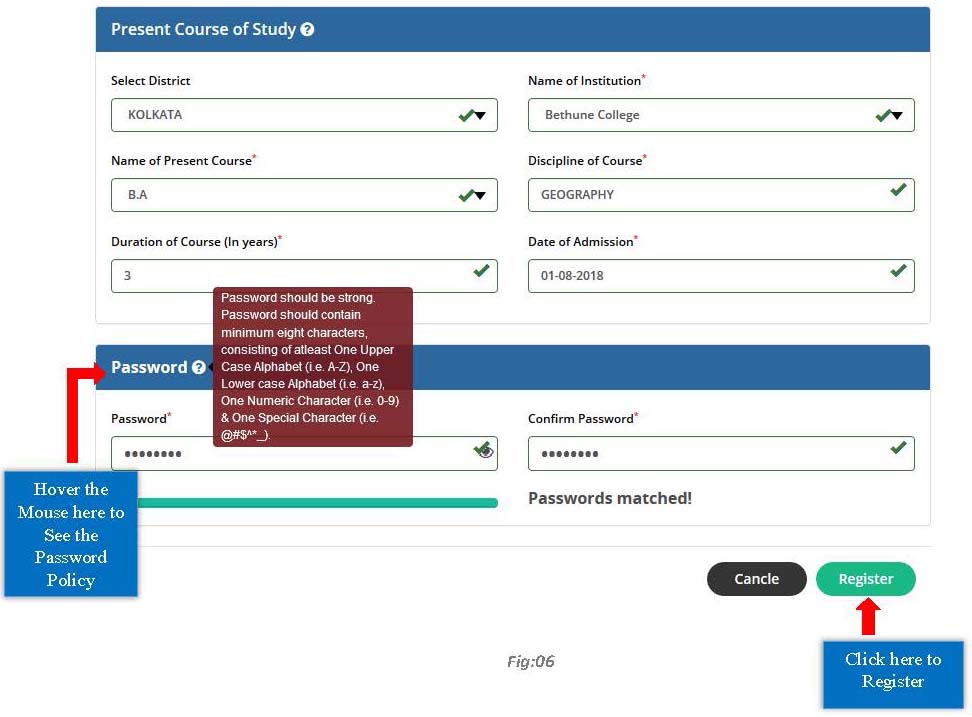
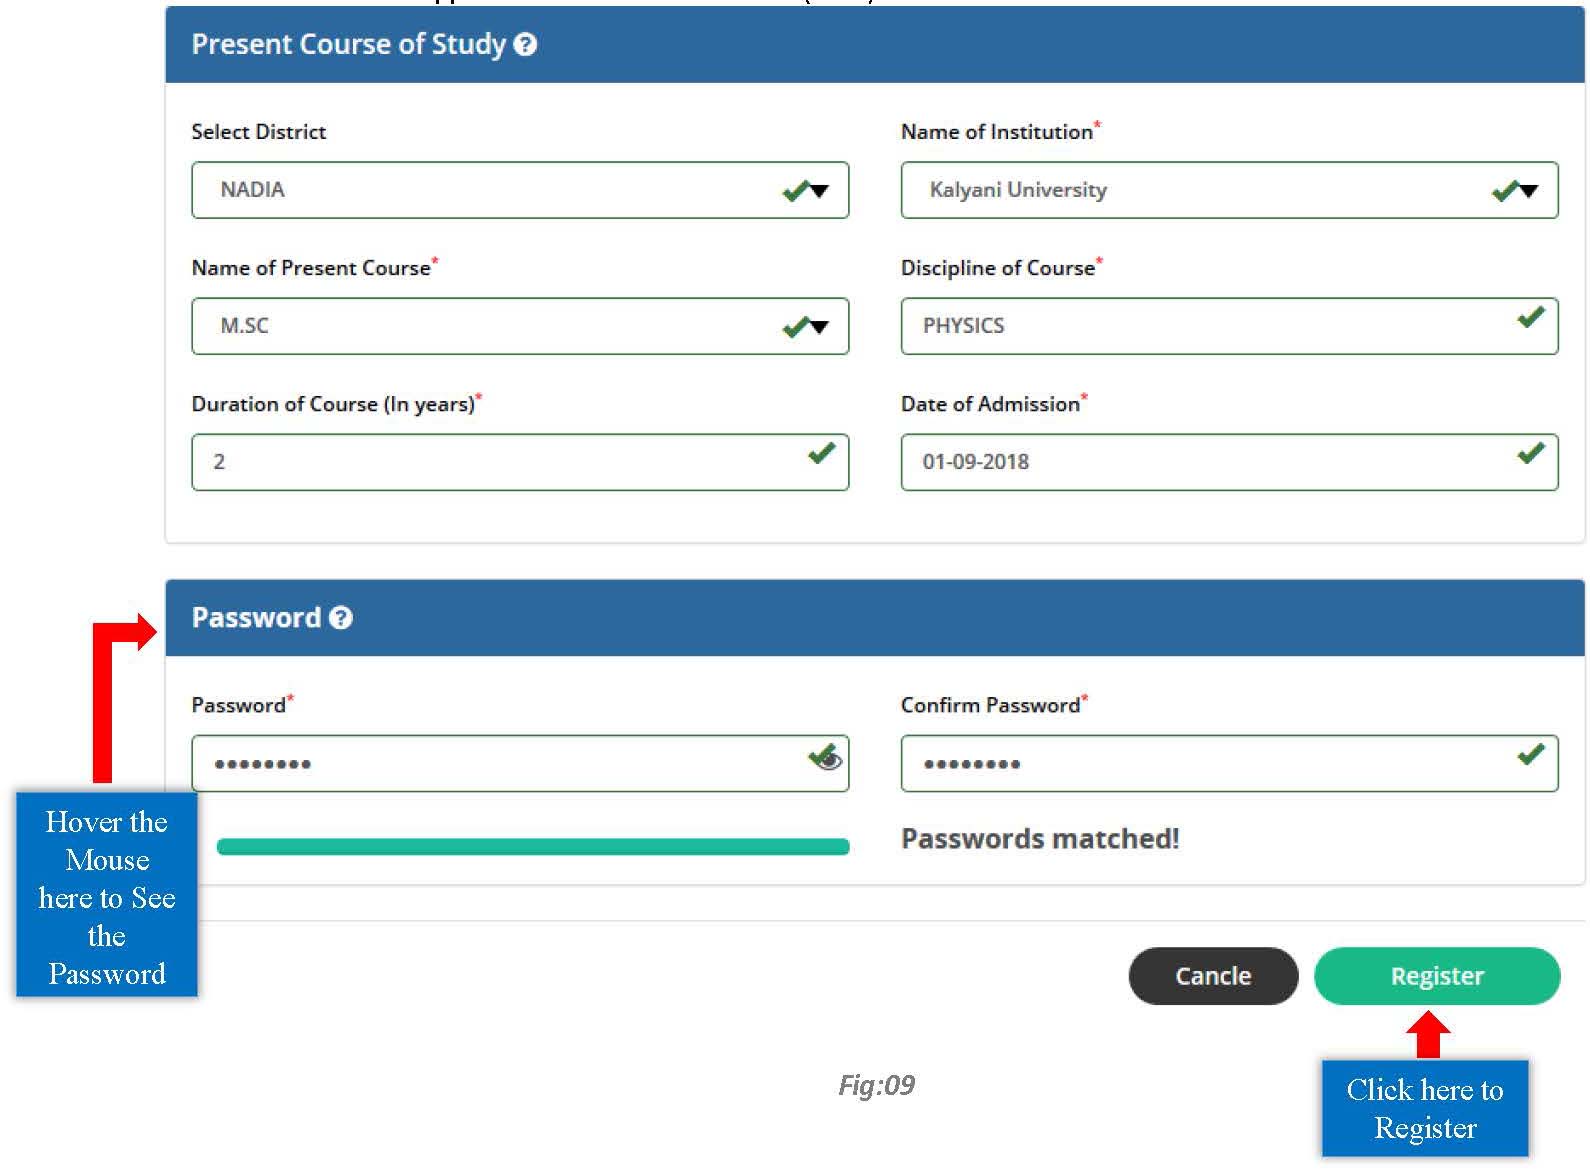
For Fresh Application, fill up the Registration form and then Click on Register button.
Obtained Marks, Total Marks and Obtained Percentage of applicants from Qualifying Examination Board of WBBSE or WBCHSE or WBSCT&VE&SD (for Lateral) will be filled up automatically.
Kanyashree (K3) Application Process:
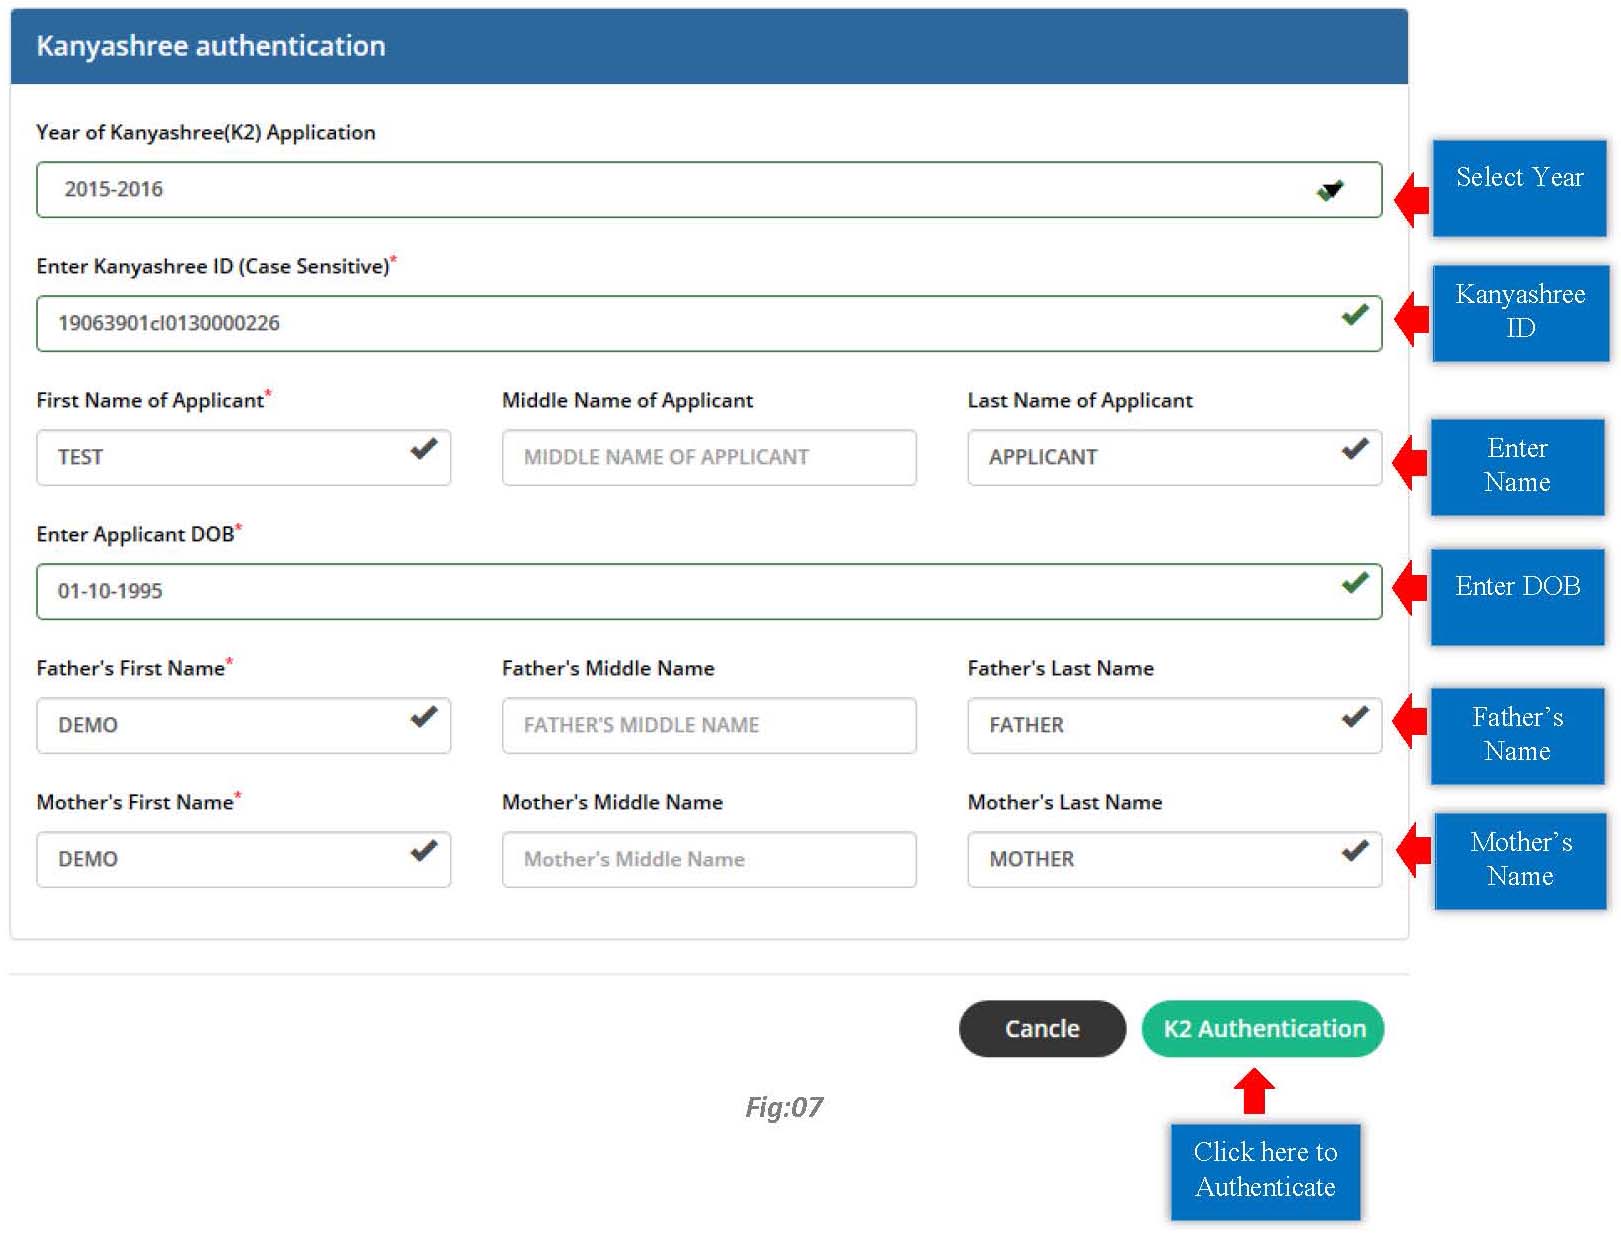
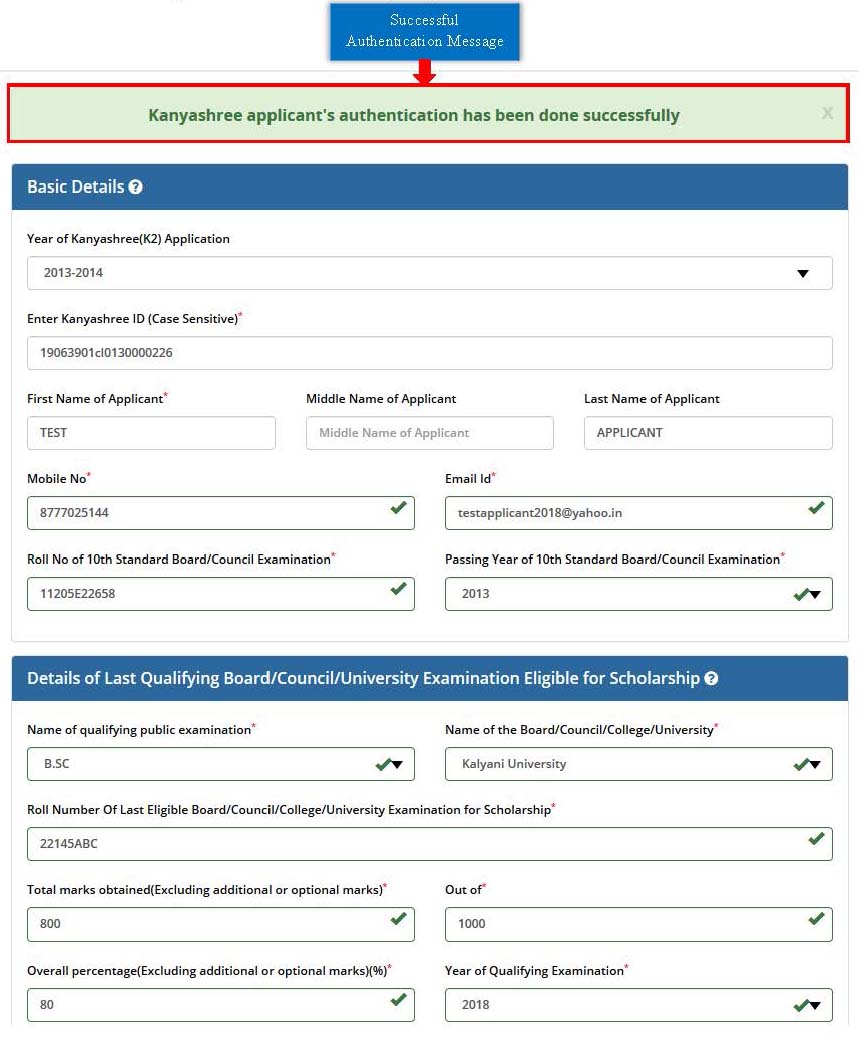
Applicants are required to Authenticate their previous Kanyashree Details for registration under Kanyashree(K3) application.
Renewal Application Process:
Renewal Applicants are not required to register, rather they will login directly with their previous SVMCM Applicant Id and Password and complete the application process.
(Please scroll down to see the login process).
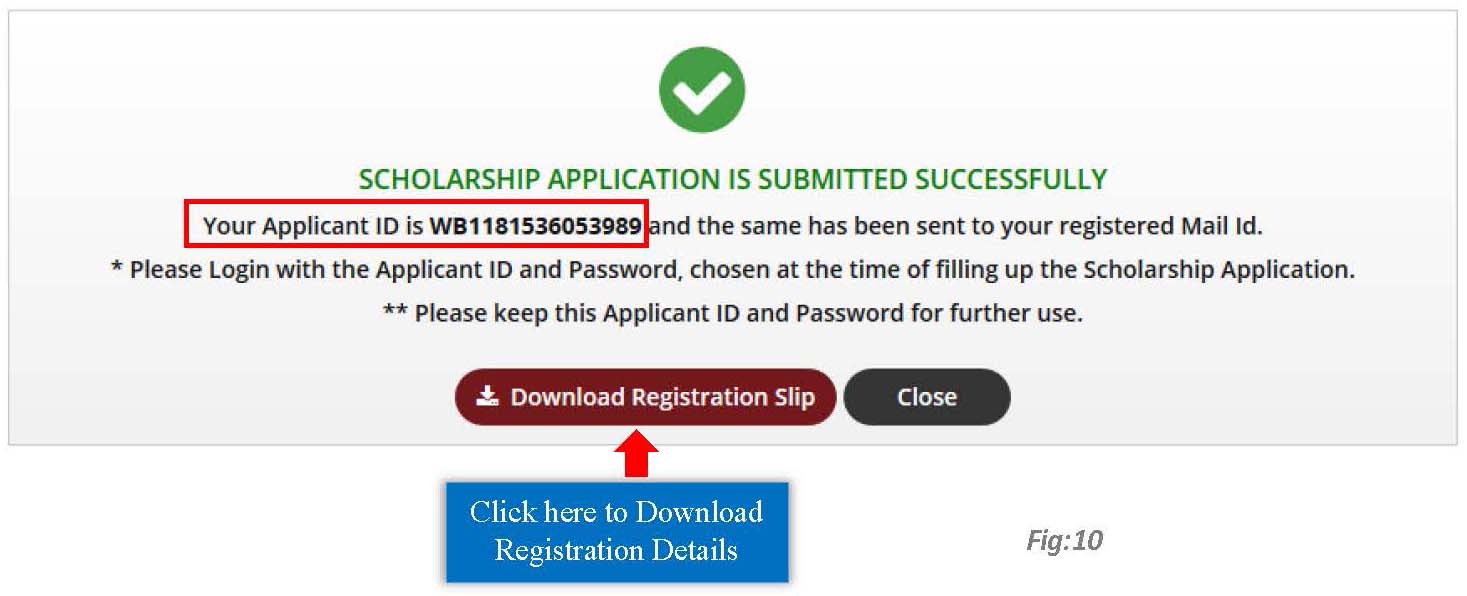
Step 5: After successful registration, an Applicant Id will be generated and the same will be sent to the registered email id. Note down the Id for subsequent login to complete rest of the Application Process and also for future use.
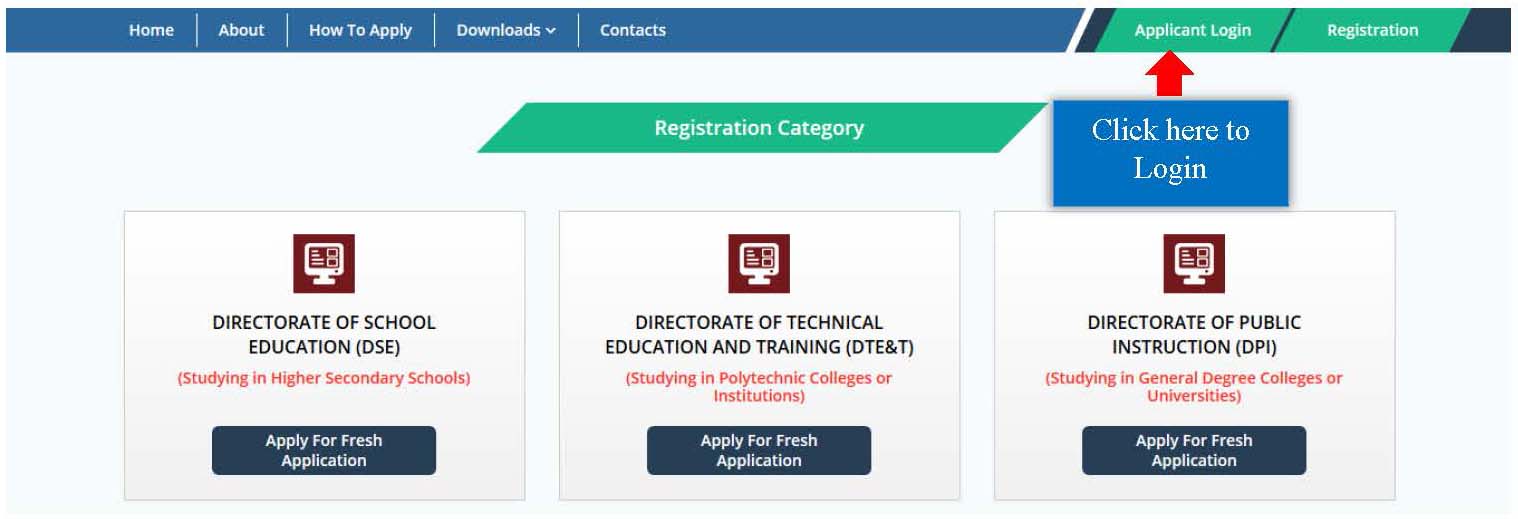
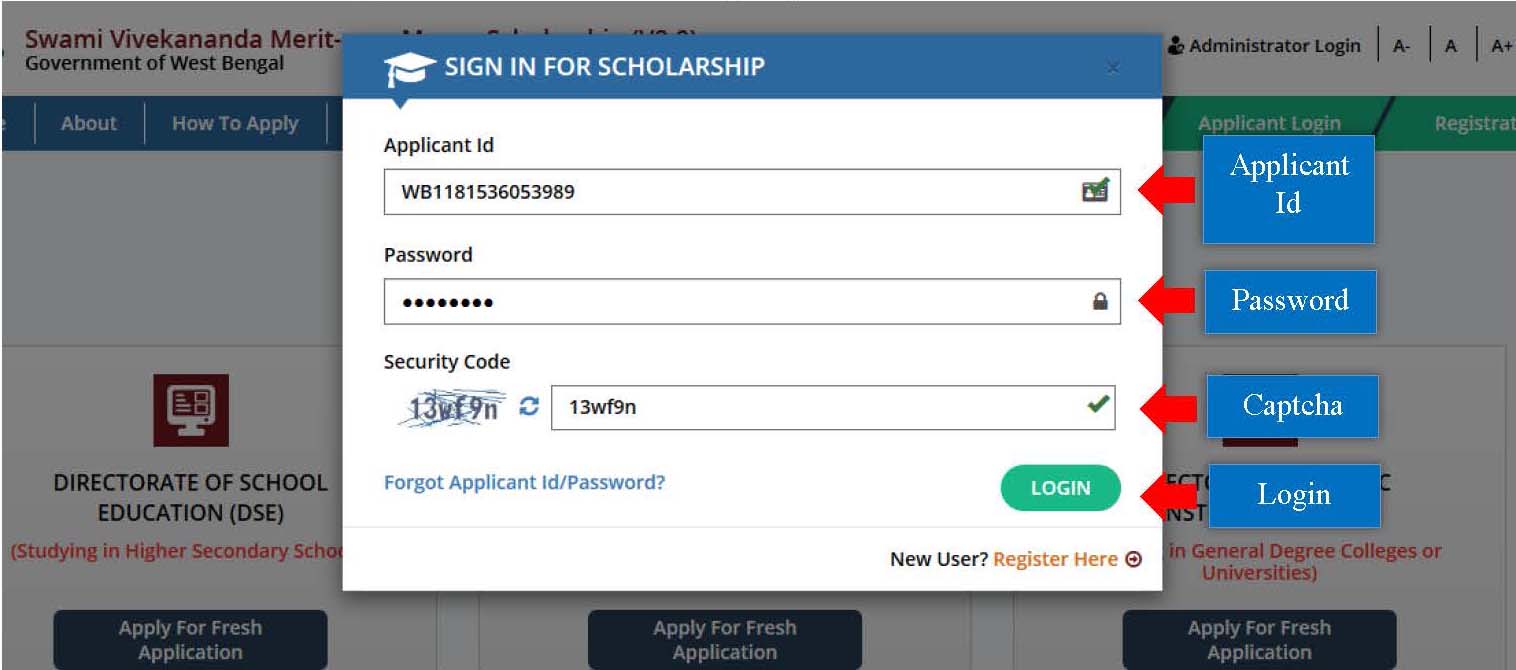
Step 6: Now click on Applicant Login option from any of the pages. Enter the Applicant Id, Password (Which was set during registration process) and Security Code in the appeared pop-up. Then click on the Login button.
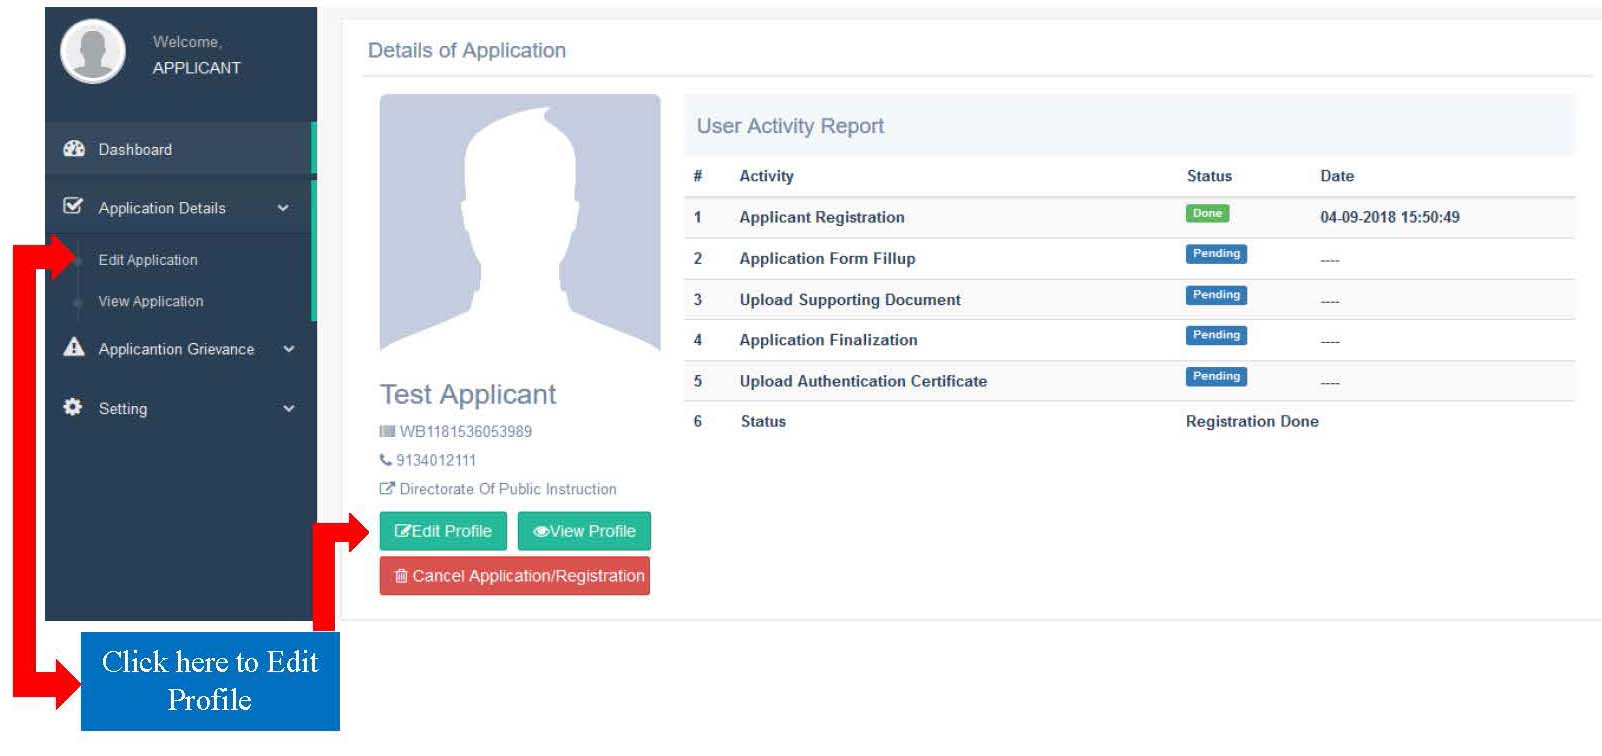
Step 7: After successful login, Dashboard of the concerned applicant will be appeared. Click on Edit Profile or Edit Application to continue the application process. Application process for Fresh and Kanyashree are same.
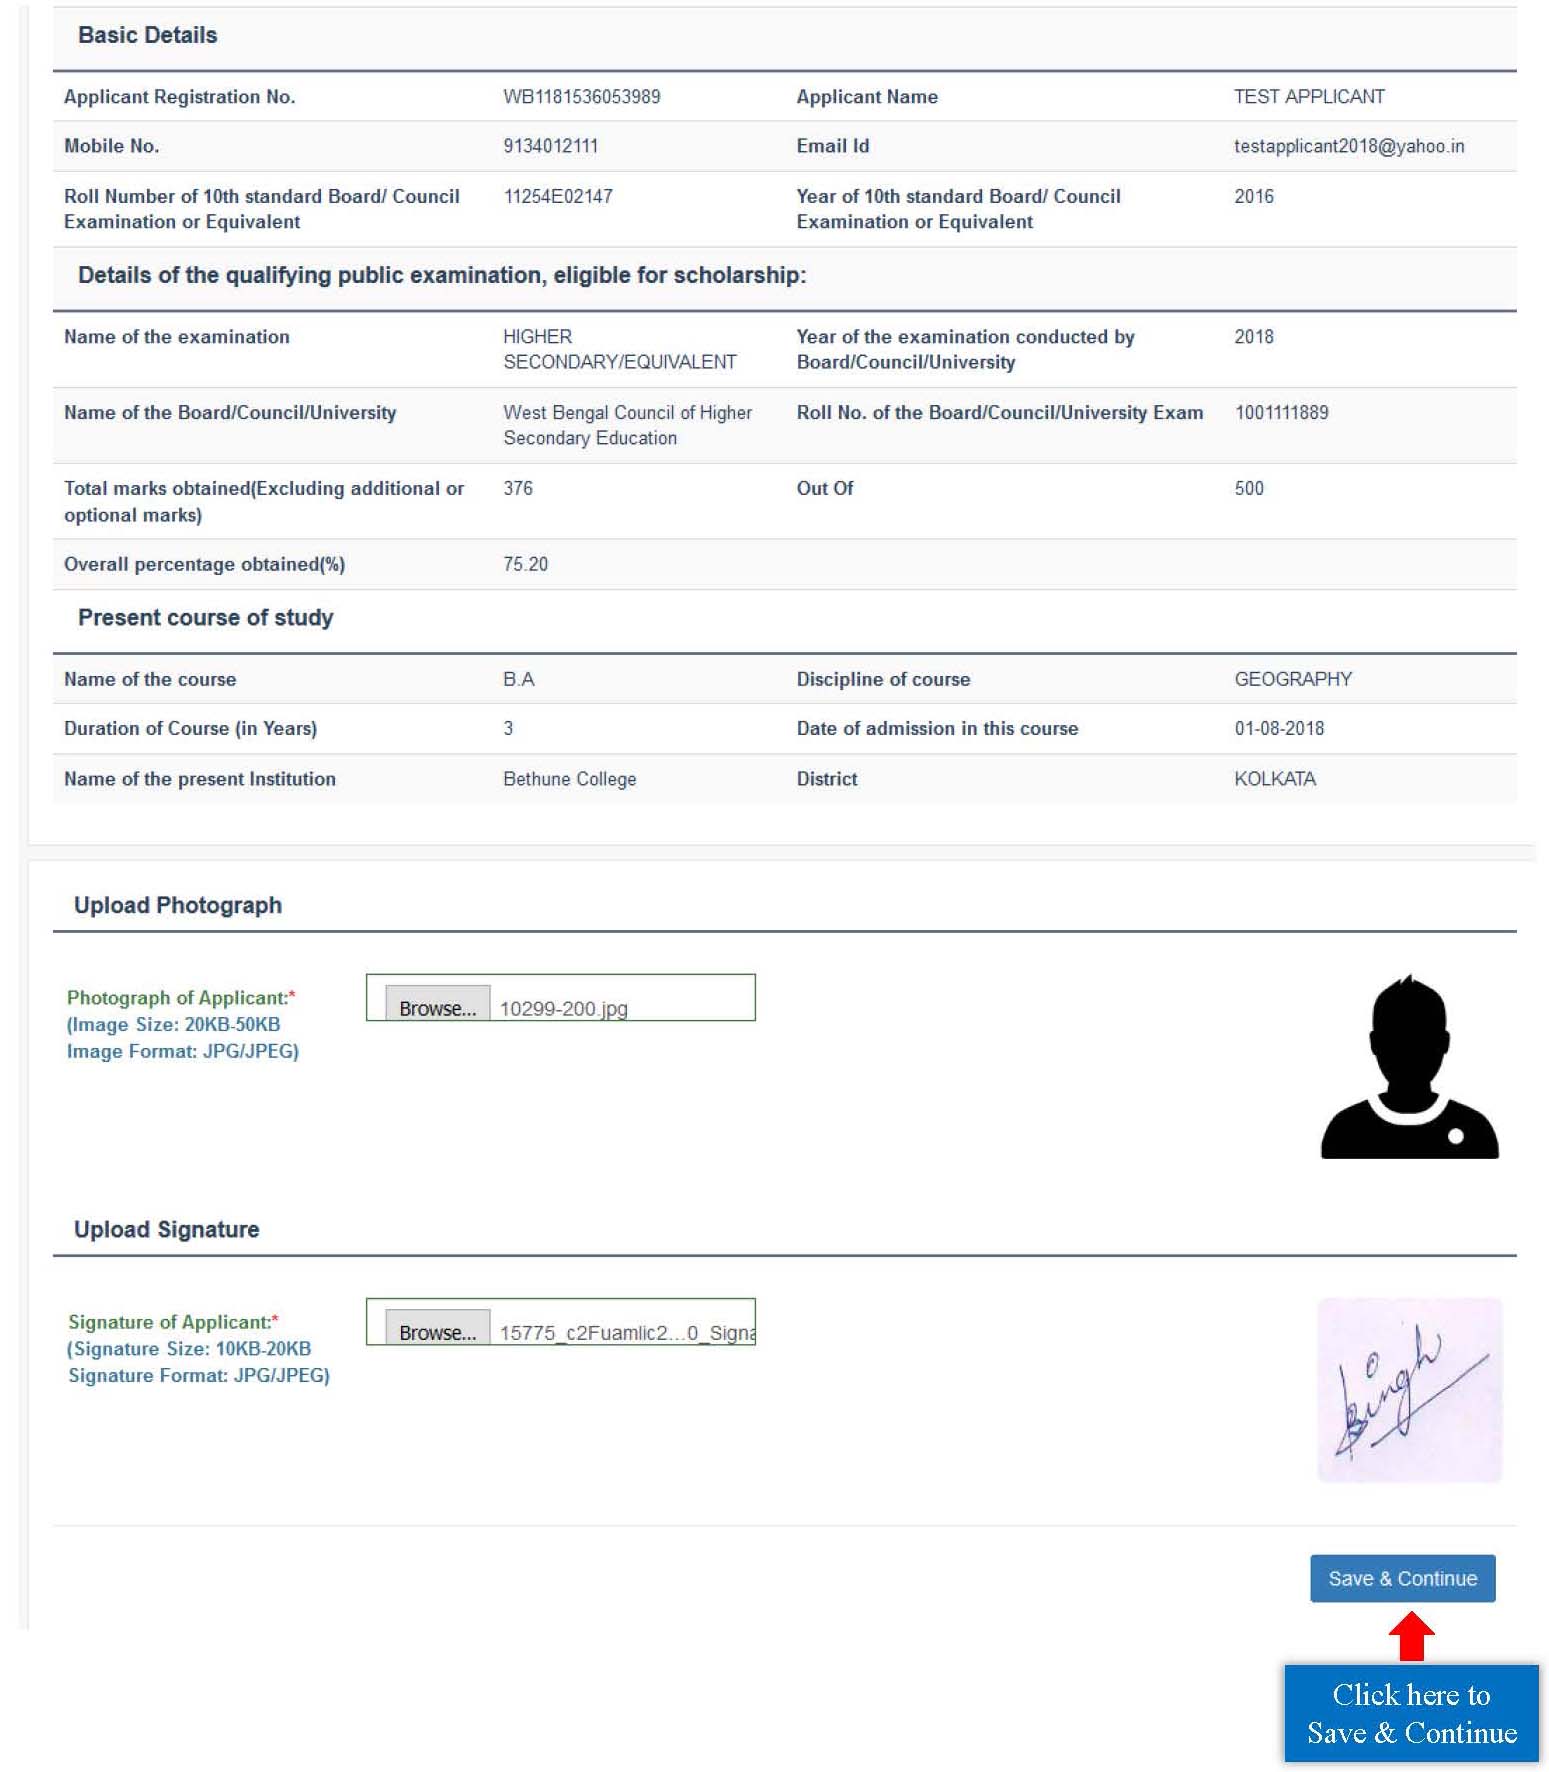
Step 8: First fill up the Basic Details form and then click on Save & Continue button. Star marked fields are mandatory fields. While uploading Image and Signature please maintain the File Format and File Size as mentioned in the form. In the Basic Details form, applicants only have to upload the image and signature as the other fields are already filled up during the time of the registration.
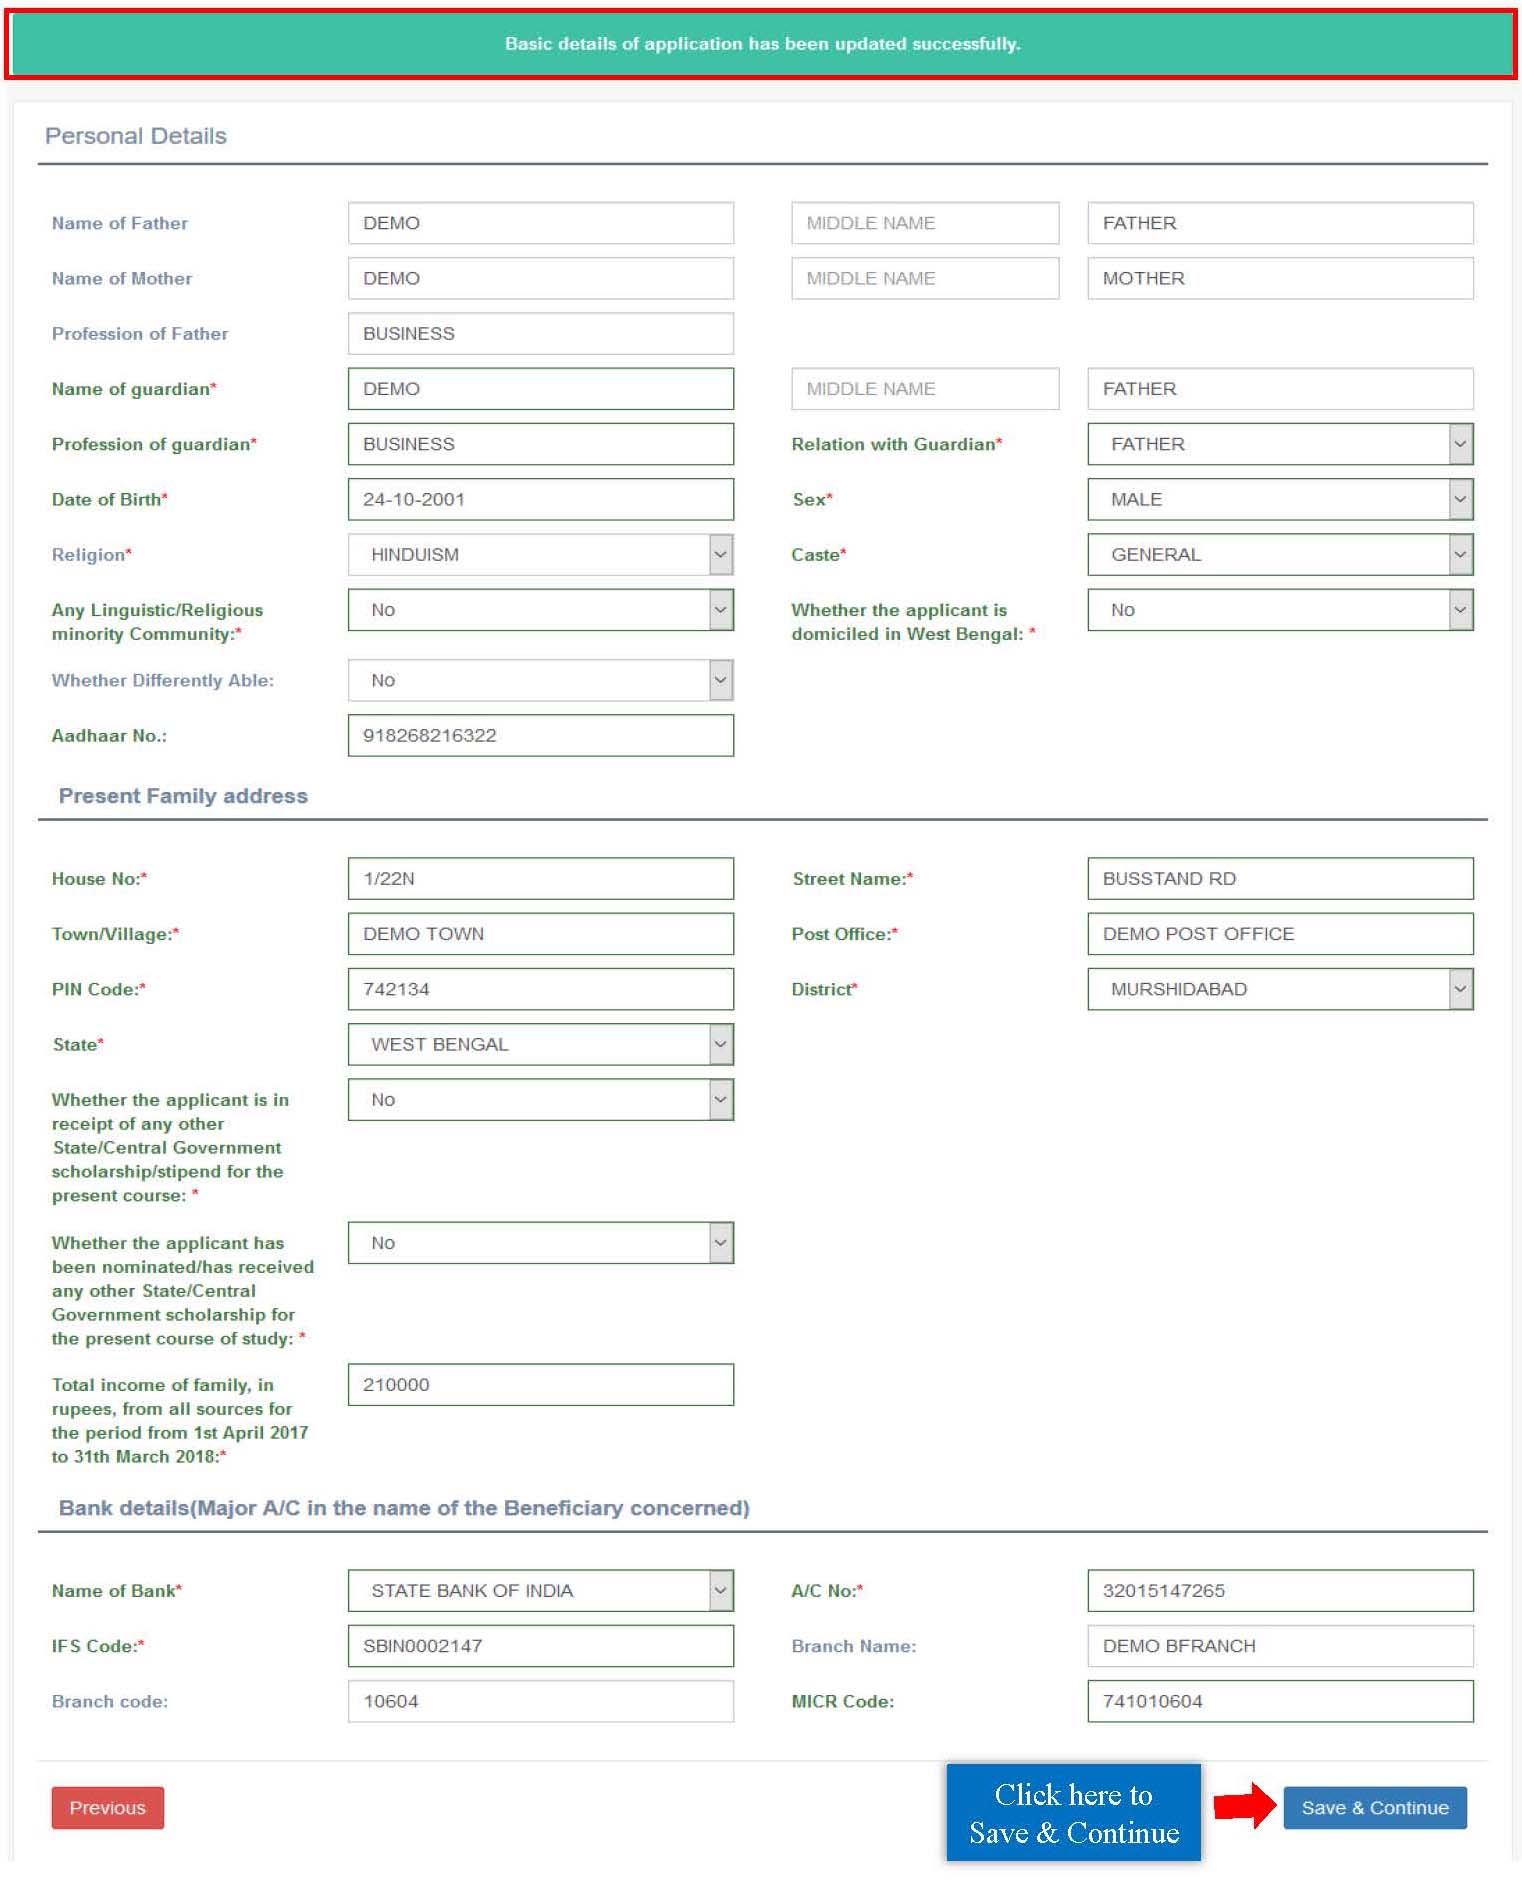
Step 9: After successful submission of Basic Details form, Personal Details form will be appeared. Fill up the form and then click on Save & Continue button. Star marked fields are mandatory fields.
For Kanyashree:
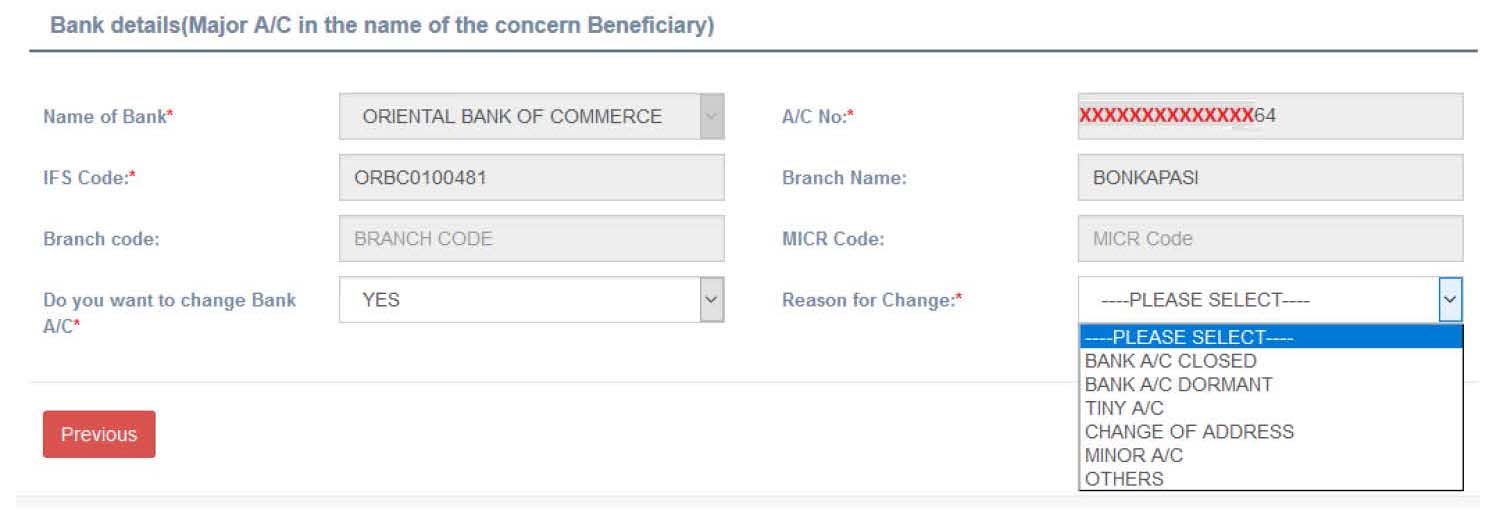
Kanyashree applicants may change their bank details as required. In that case, they have to select a reason for the change from the given list. If they select ‘Others’, then they have to mention the reason by themselves.
Step 10: After successful submission of Personal Details form, Scanned Supporting Documents form will be appeared. Upload all the necessary documents as required and then click on Submit Application button. While uploading the documents, please maintain the File Format and File Size as instructed in the form.
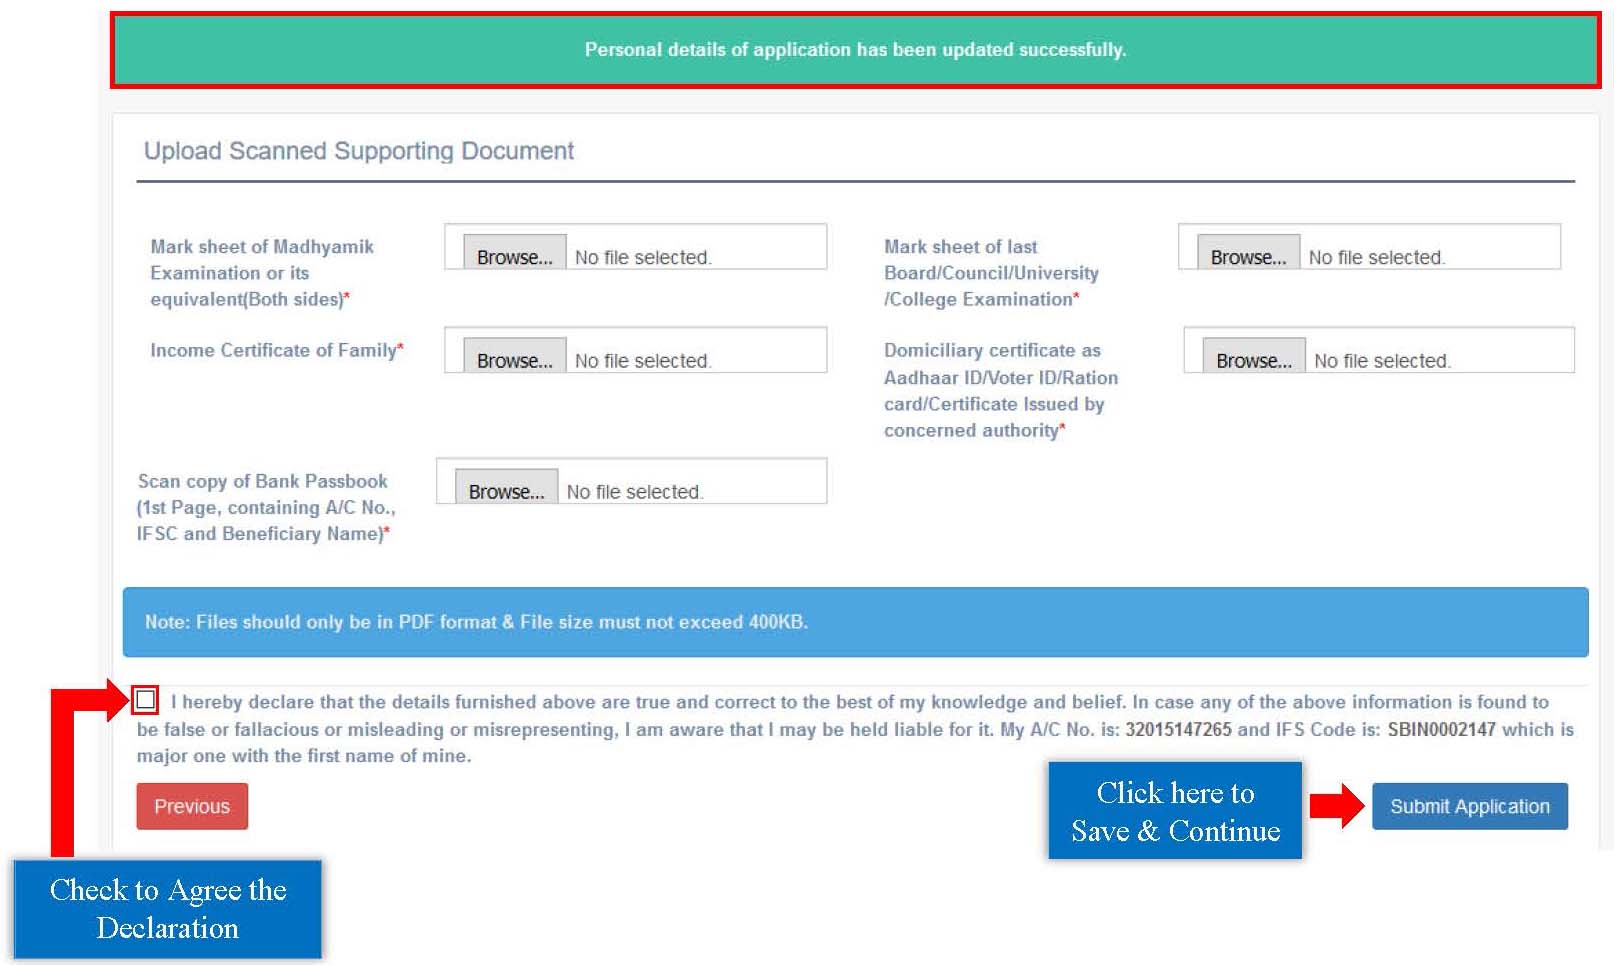
The uploading of Income Certificate is not needed for K3 applicants.
For Renewal:
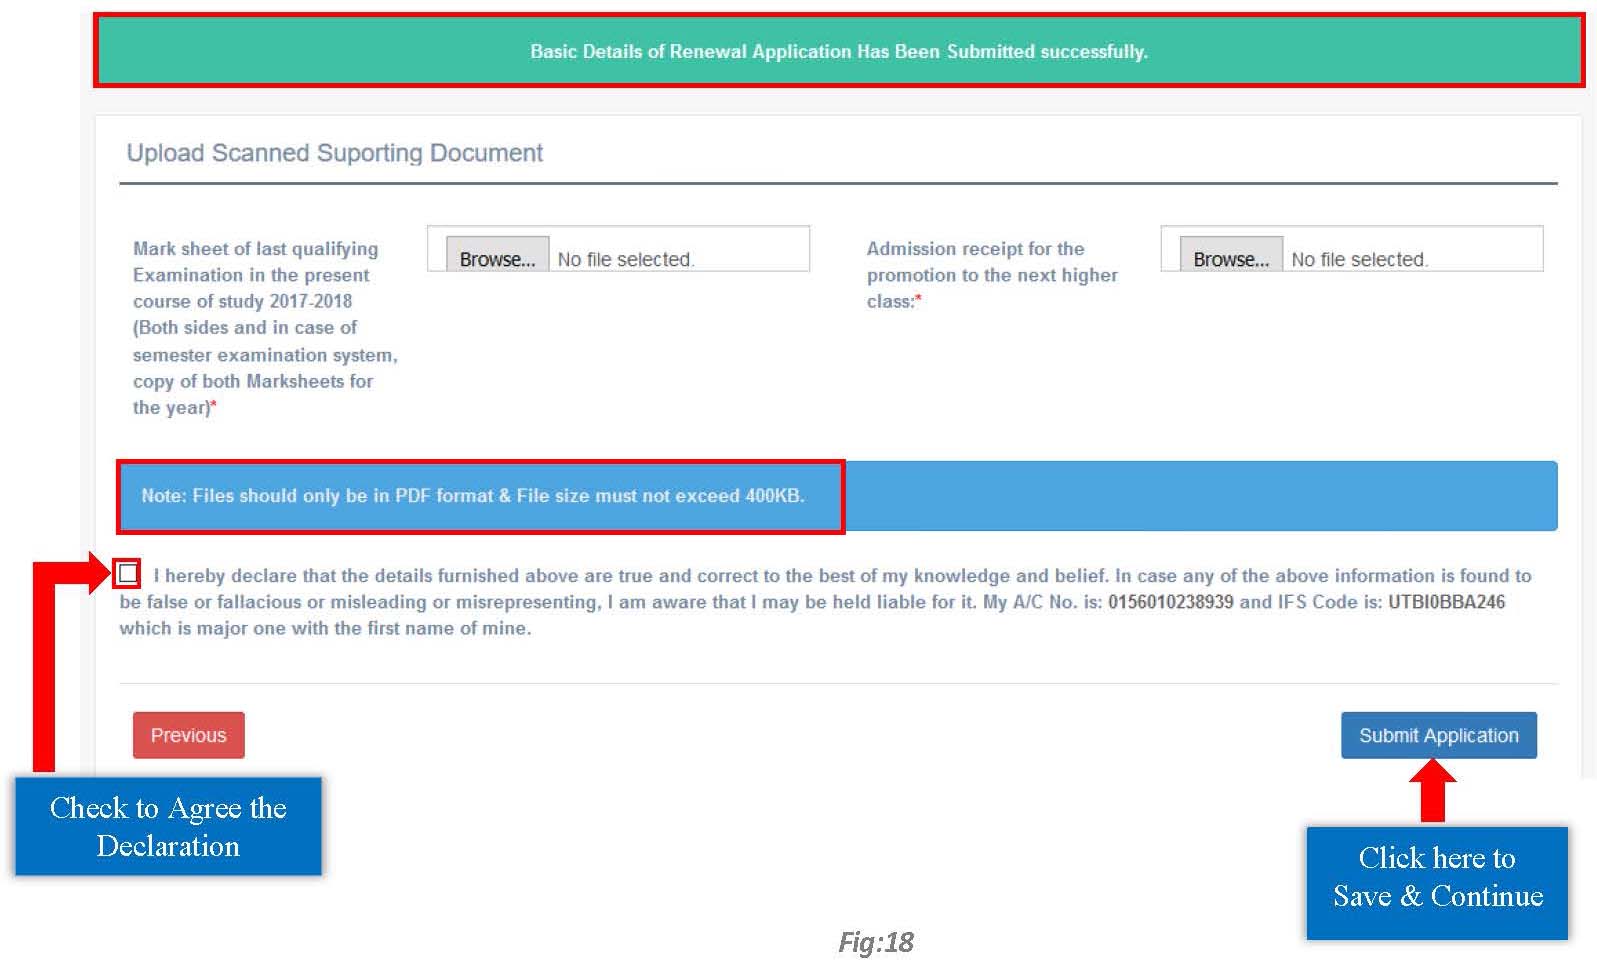
Step 11: After successful submission of the Application, a success message regarding the submission will be displayed. Applicants may download the Application details by clicking on the Download Application Details button. Click on Finalize Application button to finalize the application.
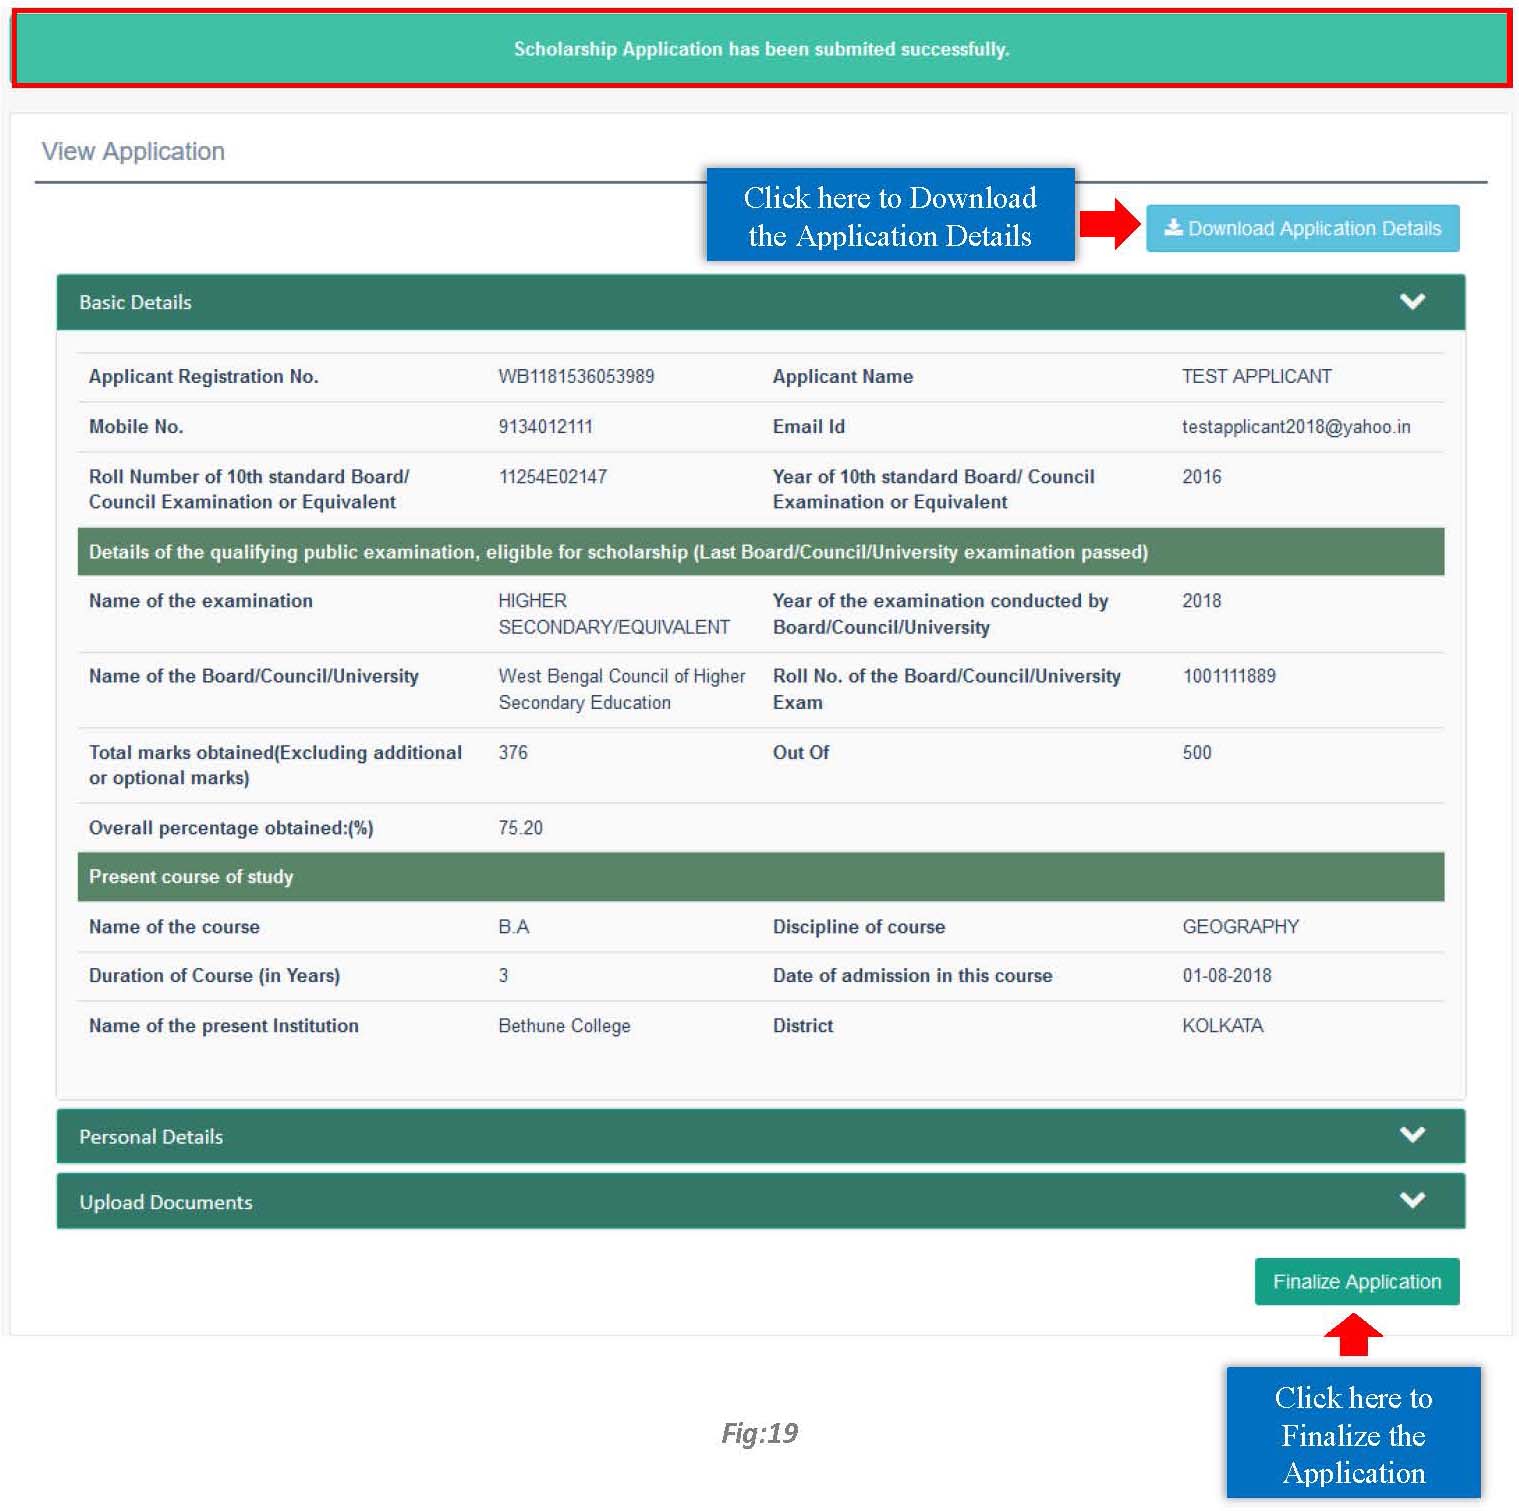
Note that, once an application is finalized, it cannot be edited anymore.
Step 12: After finalization, a page will be appeared for uploading the Verification Certificate of Head of Institution. At first, click on Download Head of the Institution Verification Certificate button to download the certificate. Then get the certificate attested with Signature and Official Seal of Head of the Institution concerned. After that upload the scanned copy of the attested certificate and click on Final Submission of Scholarship Application button for final submission of the application.
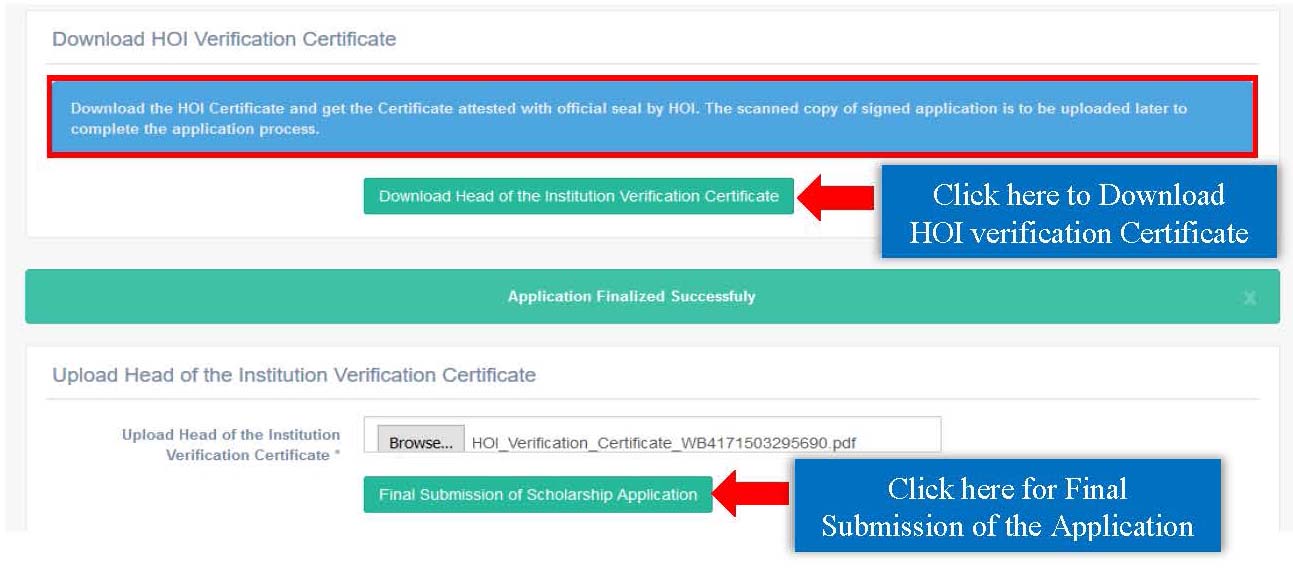
After final submission, a success message regarding successful submission of the application will be displayed.

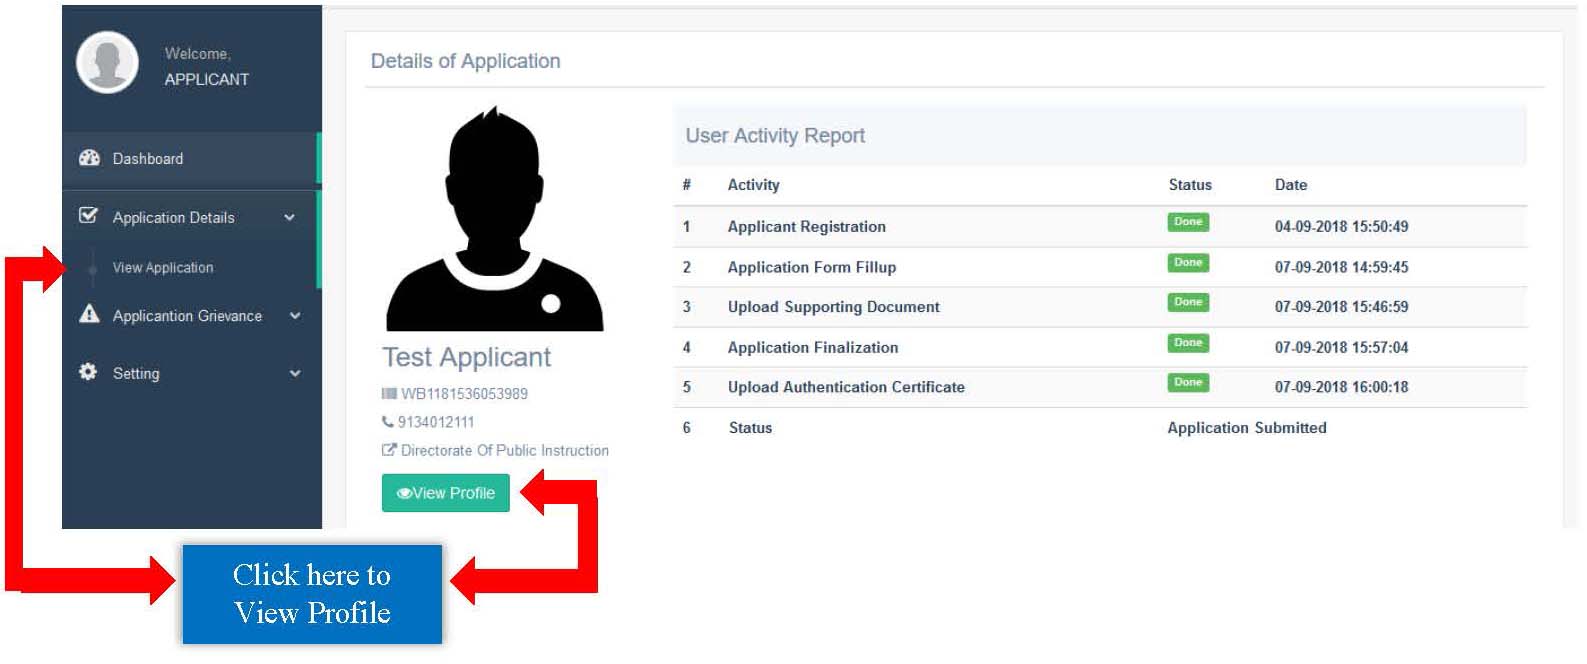
To view the Profile/Application, click on View Profile option in Dashboard or click on View Application option under Application Details tab in Menu area.
Forgot Applicant Id/Password:
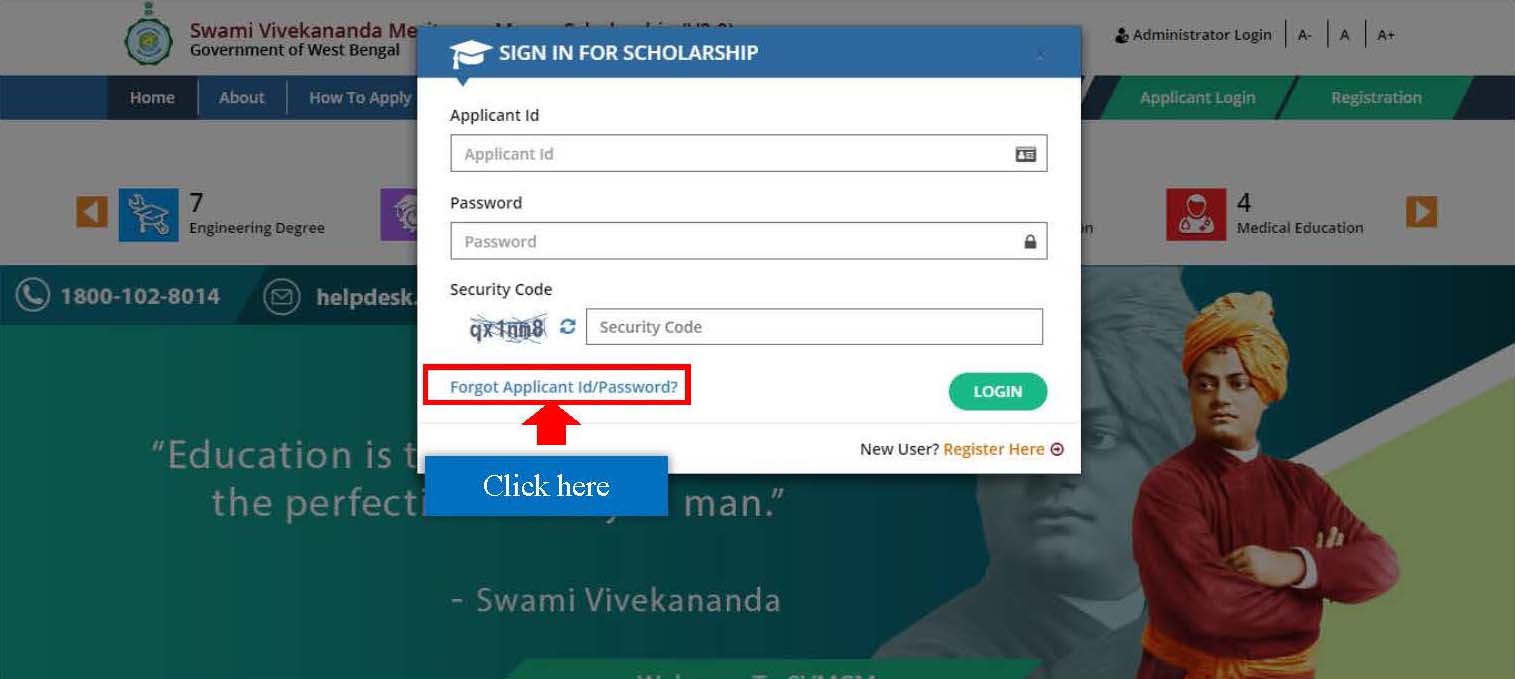
To retrieve Applicant Id/Password click on Forgot Applicant Id/Password option on the Login pop-up from the Applicant login option.
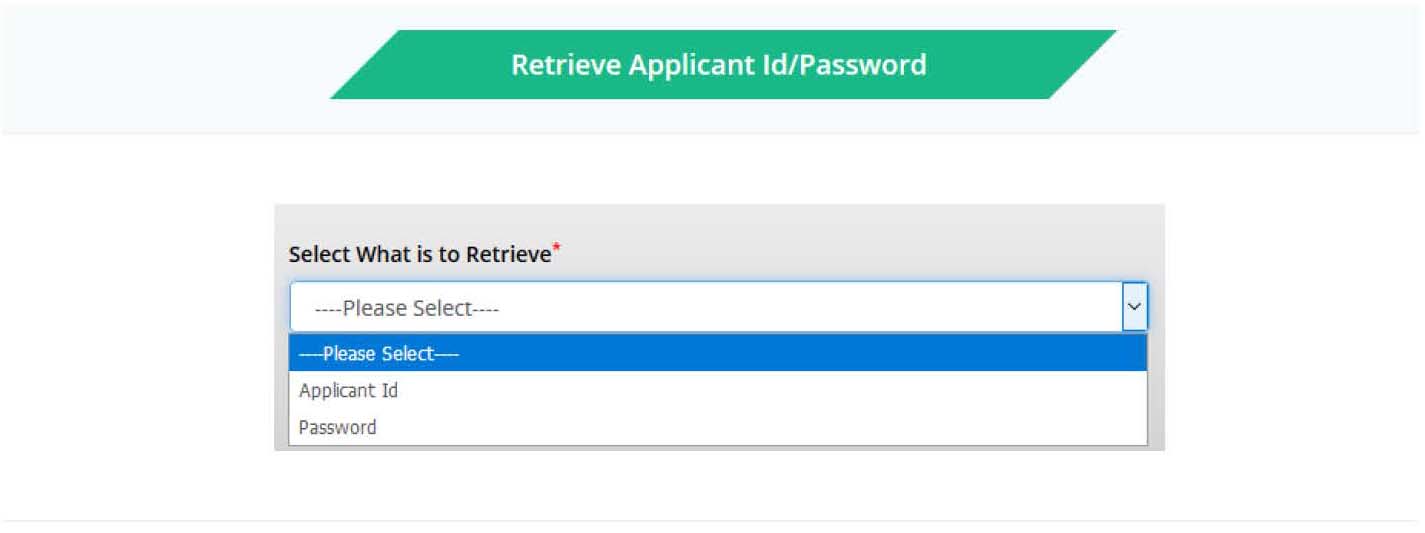
Select what is to retrieve from the given option and then click on the Proceed button. After selecting a option the relevant form will be appeared.
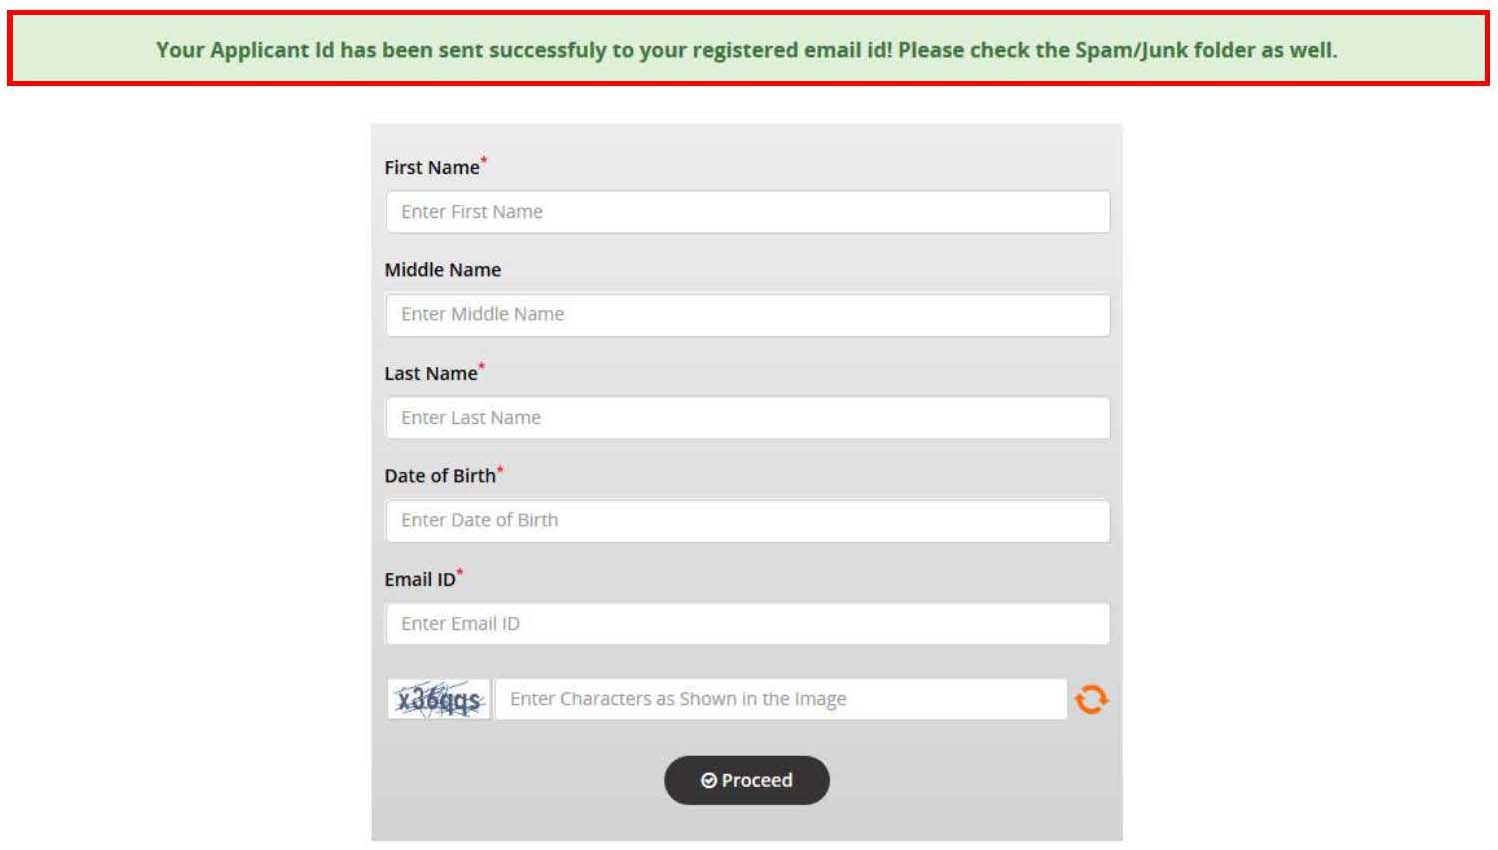
For Applicant Id:
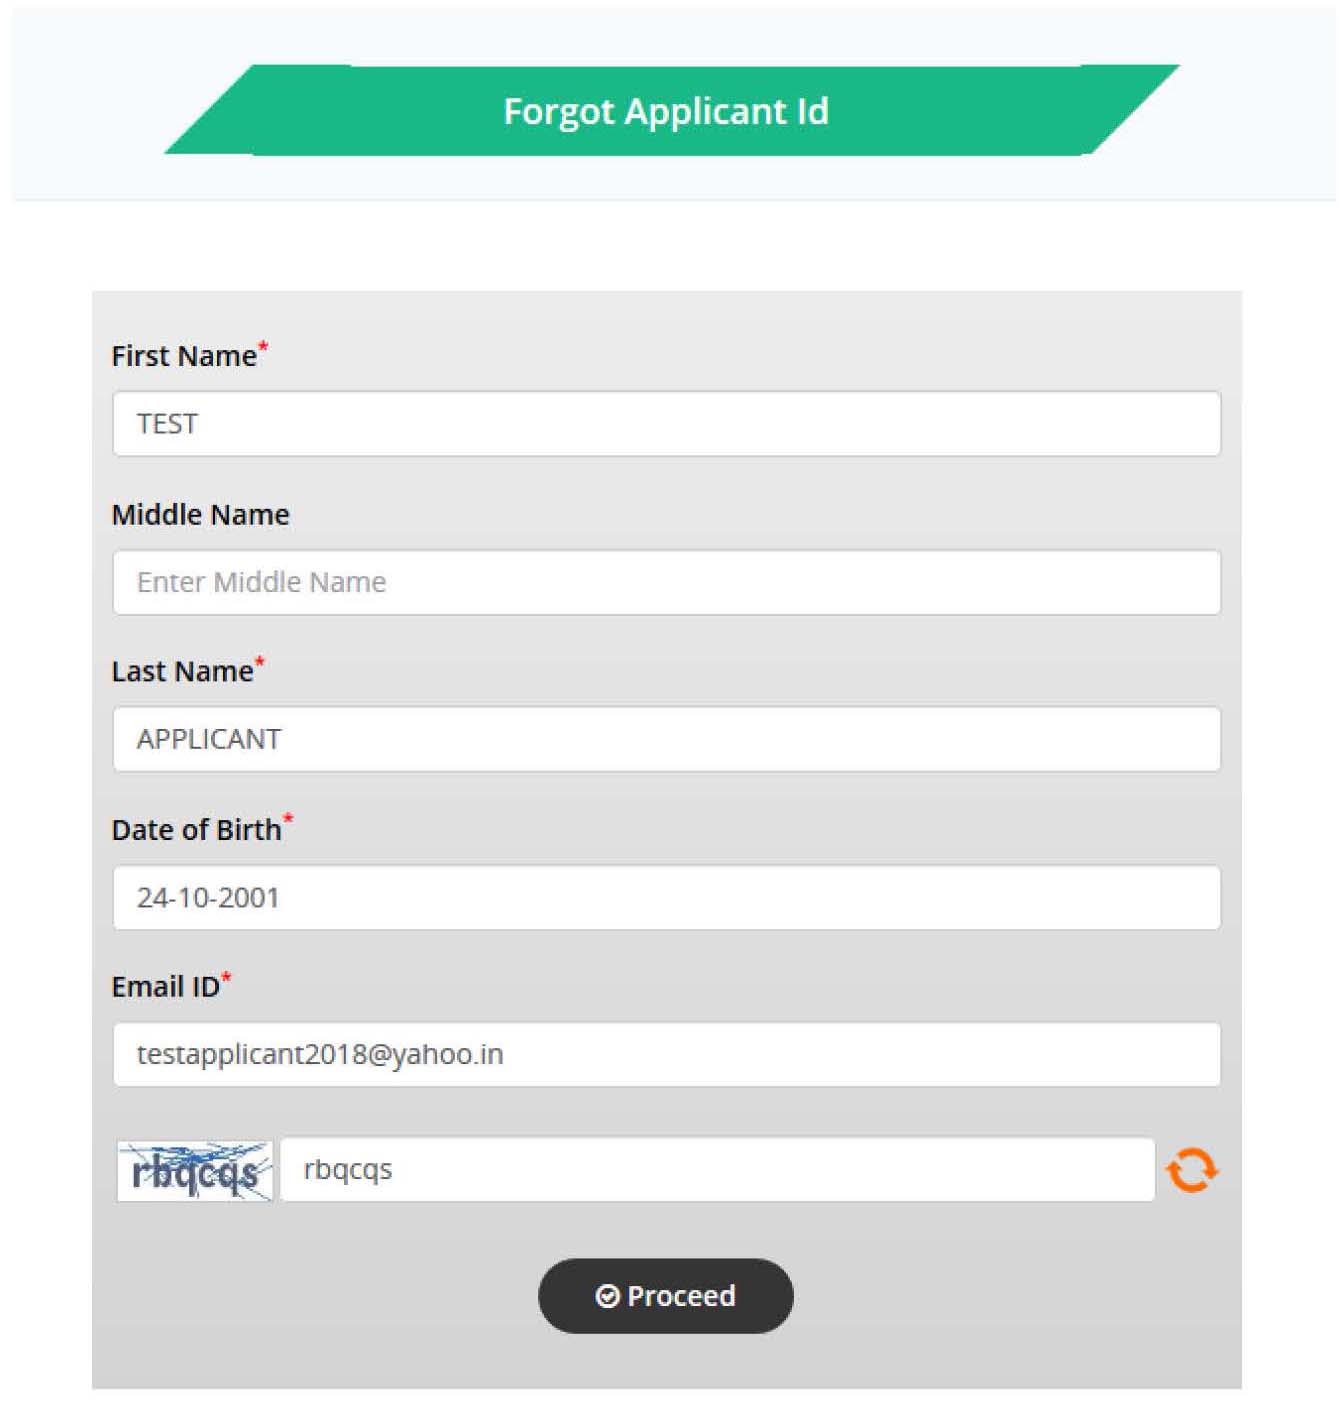
Enter the required details as First Name, Middle Name (if any), Last Name, Date of Birth, Email Id and Security Code and click the Proceed button.
After successful authentication your Applicant Id will be sent to your registered email id. Kindly check the Spam/Junk folder as well if the email is not received in Inbox.
For Password:
Enter the required details, i.e. Applicant Id, Email Id and Security Code and hit the Proceed button.
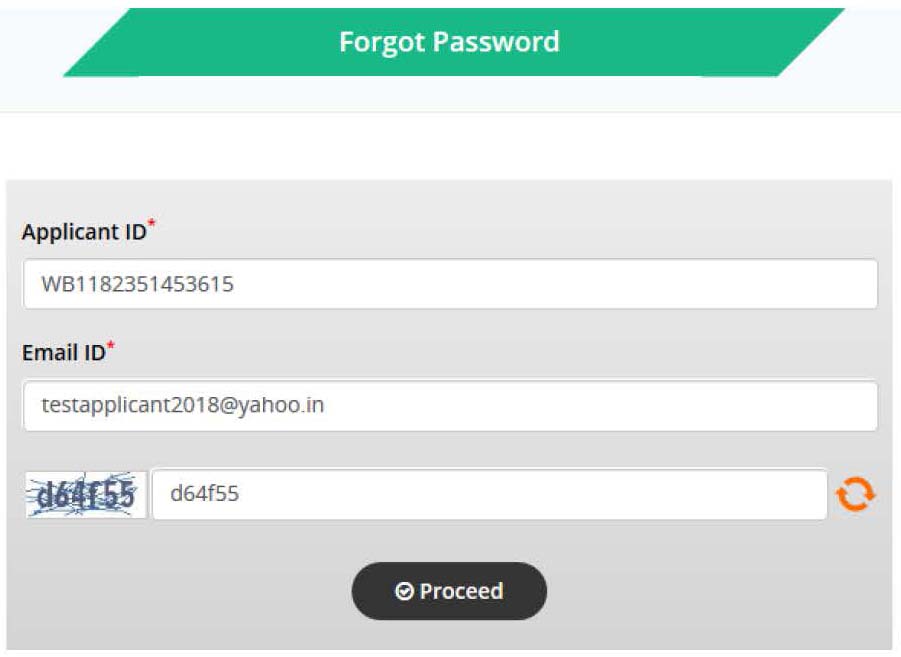
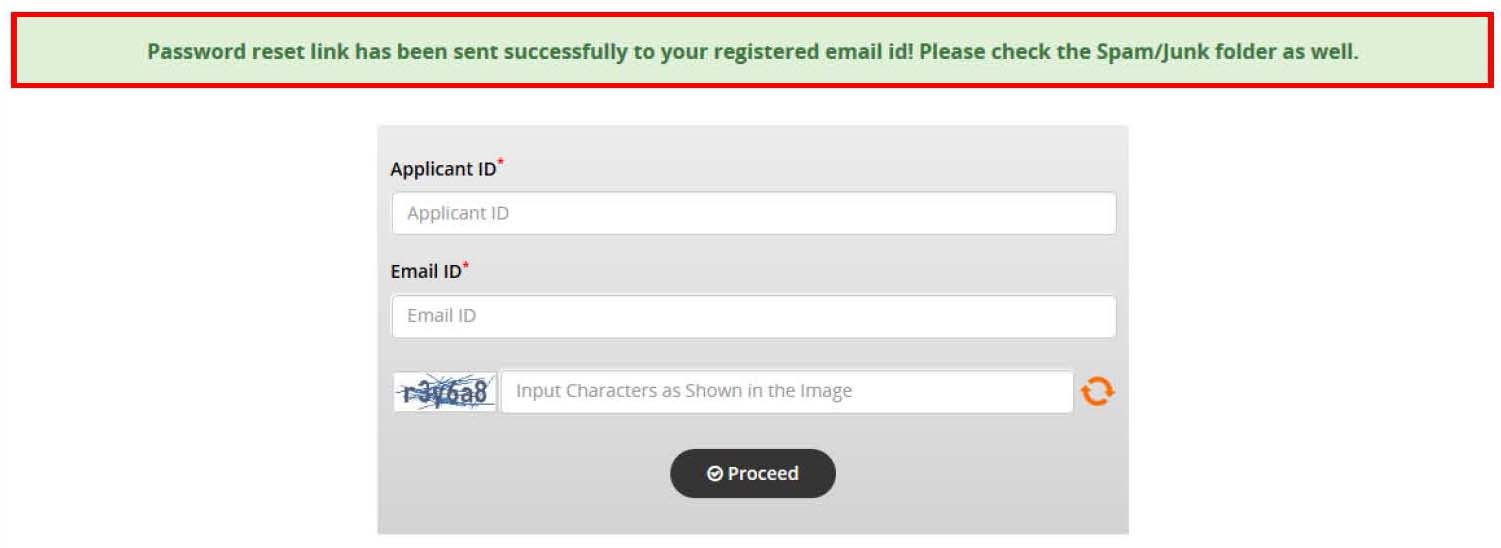
After successful authentication an email containing the link to Reset the Password will be sent to your registered email id. Kindly check the Spam/Junk folder if the email is not received in Inbox.
Change Password:
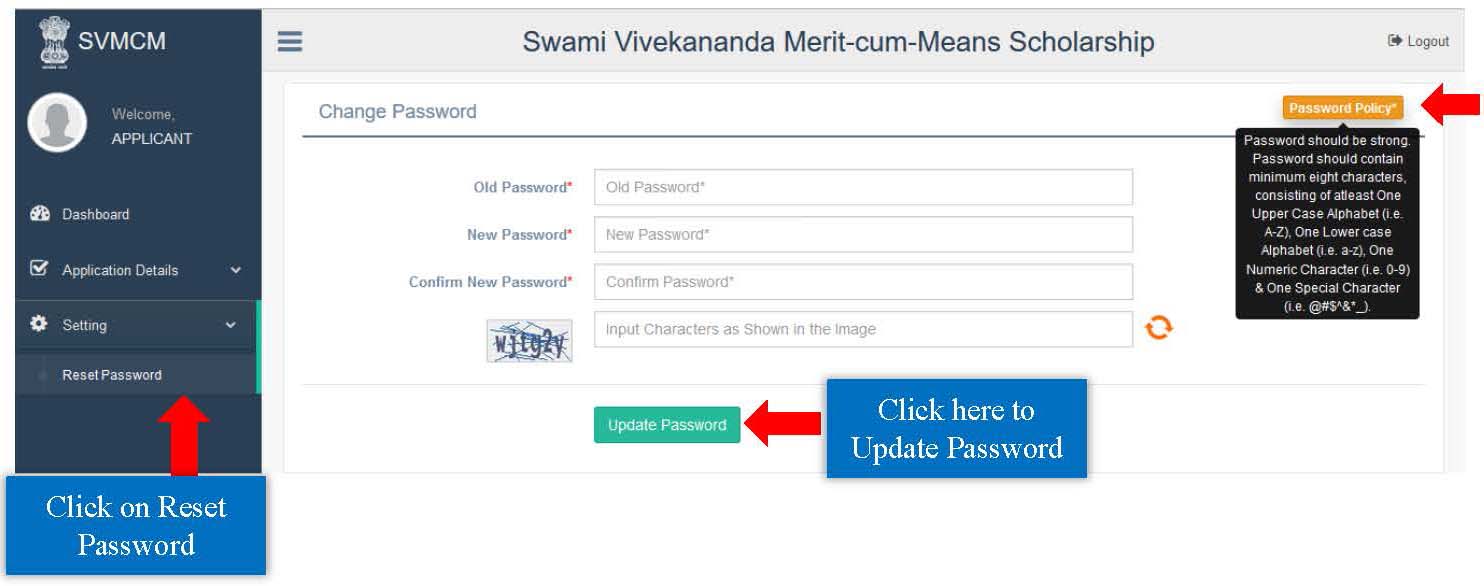
To change Profile Password, Click on Reset Password option under Setting tab in Menu area. First enter the Existing Password, then New Password for confirmation and Captcha. Click on Update Password button.
Technical Helpdesk:
Please contact us for further queries and consequent operational support via Helpdesk for user support.
- Support mail id: helpdesk.svmcm-wb@gov.in
- Toll free help line no: 1800 102 8014 (10 AM to 6 PM except Sundays)