WEST BENGAL COUNCIL OF HIGHER SECONDARY EDUCATION
VIDYASAGAR BHAVAN 9/2, BLOCK-DJ, SECTOR II, SALT LAKE KOLKATA- 700091
Memo No: L/SECY/66/2022 Date: 24/08/2022
NOTIFICATION
I am directed to notify all the Higher Secondary Institutions that the Council is going to start ONLINE registration of the students of Class-XI (2022-2023 Session) from 26th August, 2022. Schools will be given secured login credential to school mail-id to visit the site https://wbchseapplication.wb.gov.in/portal/sec_users/login for filling up the registration form through mobile/ website. In this context, it is also notified to all concerns that council is uploading its new website in the domain www.wbchse.wb.gov.in through which one can also accesses online registration. For accessing online registration portal through new council website, schools are advised to visit Institution Tab. Detailed instructions in this regard will be available in both the council websites. A link will be provided for a certain time in the current website www.wbchse.nic.in which would enable the user to visit the new website wbchse.wb.gov.in. Subsequently all the updates (Notification/ Circular, etc.) will be uploaded only on the new council website (www.wbchse.wb.gov.in).
All the Institutions are directed to follow the instructions and fill up the Registration form first and get an auto generated challan for payment of the requisite fees through any of the given mode as prescribed in the instruction. The last date of submission of form without late fine is 28th September, 2022. However, the Registration portal will be further operational from 12th October, 2022 to 20th October, 2022 with late fine (at the rate Rs. 100/- per student for Registration and Rs. 100/- for Enrolment). Any query during filling up of registration form may be sent to accountsofficer@wbchse.org.in for further processing.
Detailed guideline for online registration is attached herewith.
Tapas Kumar Mukherjee
Secretary-in-Charge, WBCHSE
No. L-SECY-66 dated 24.08.2022, Source
1. School Admin Dashboard
Admin dashboard is the interface for the admin to control the administrative activity. The mostly used set of functions will be covered in this section. The admin would be able to do the activities including:
- Fill Registration Form
- Make payment for Registration form
- Add and pay for class XI failed student
- Fill different school forms like Excess Admission Request, Co-Education Permission Request, Post Conversion Request etc.
1.1 Admin Sign in
Description: User (Admin) needs to sign in with his login credentials to access the admin application.
Step 1. User enters the admin URL (https://wbchseapplication.wb.gov.in/portal/main) in address bar.
Step 2. The Admin Sign In page will be displayed:

User can log in the system using following steps:
- User can be able to enter his Username.
- User can enter valid password in the Password field.
- User clicks on the checkbox near “Remember Me” link, his login credentials have been remember by the browser until his log out.
- User enters the Captcha text in the respective field
- User then clicks on the Sign In button and system redirects him to the School Admin Dashboard
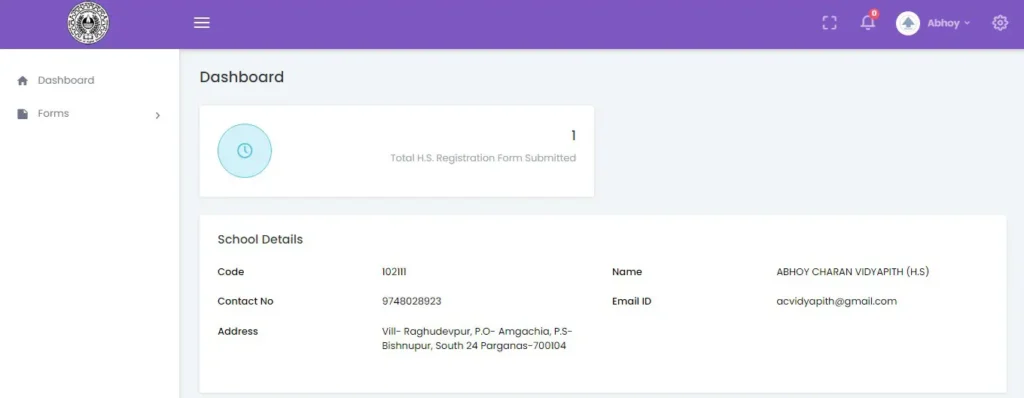
1.1.1 User clicks on Forms menu —School Application and Student Application two submenus will open.
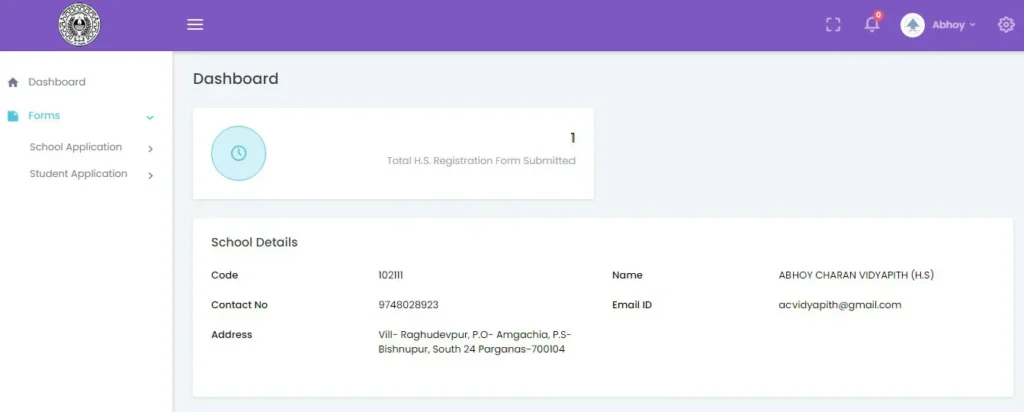
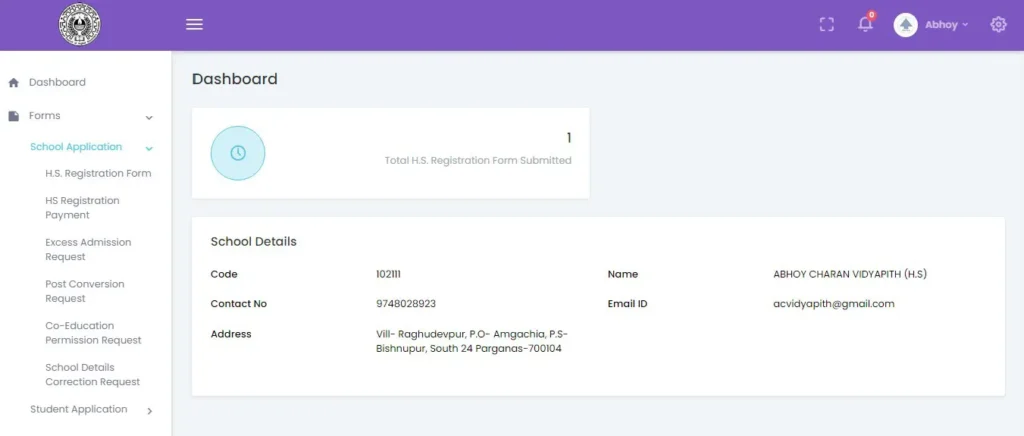
1.1.2 User clicks on the School Application submenu, a list of links will open
1.4 Fill Registration form
Description: User needs to fill a new registration form or view/edit an already filled registration form.
Step1. User Sign in into the portal using his login credential received through mail and clicks on the link HS Registration Form.
Step2
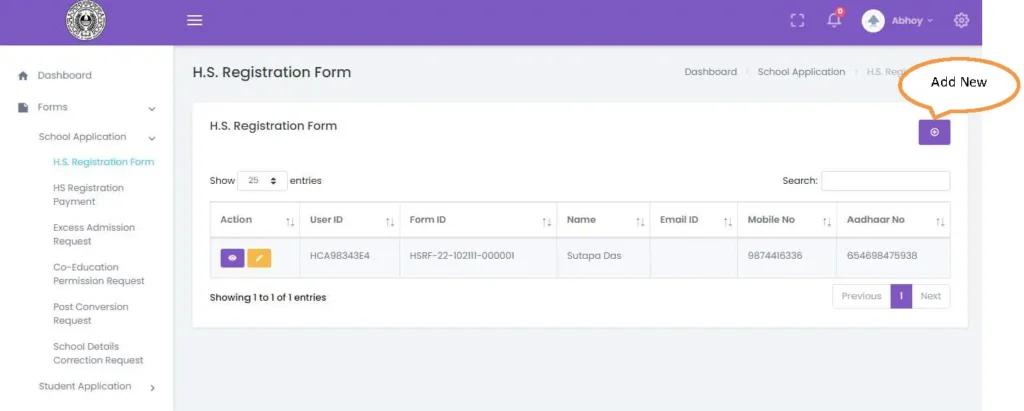
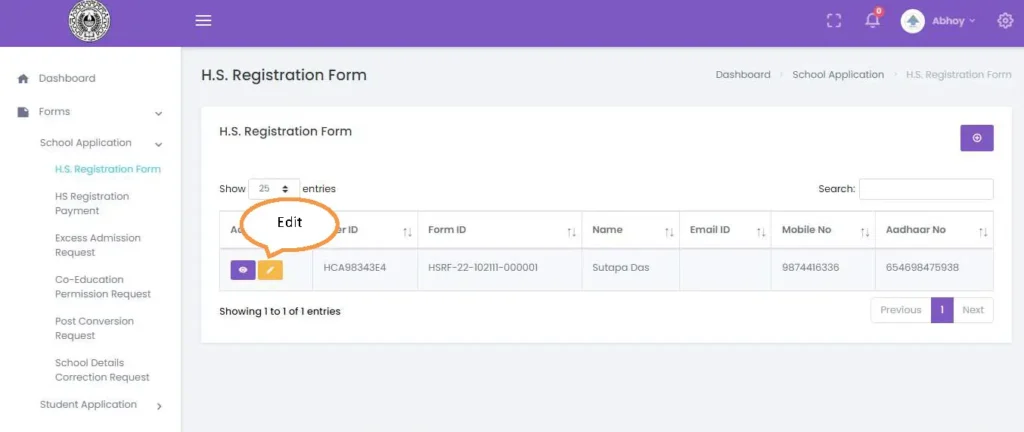
List of filled registration forms shows
Step3. Clicks on the Add New button and a new registration form will open.
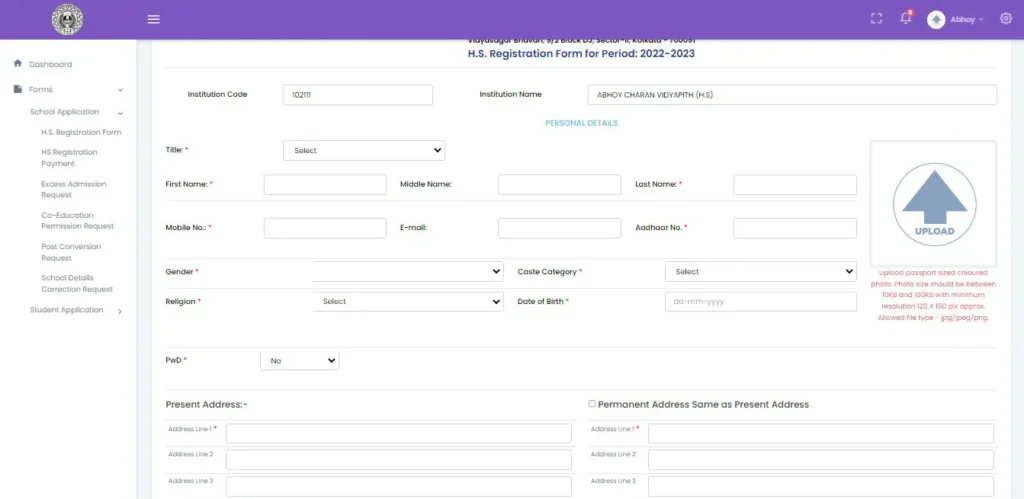
fill the form, upload required documents and submit the form by clicking Submit button at the bottom of the form.
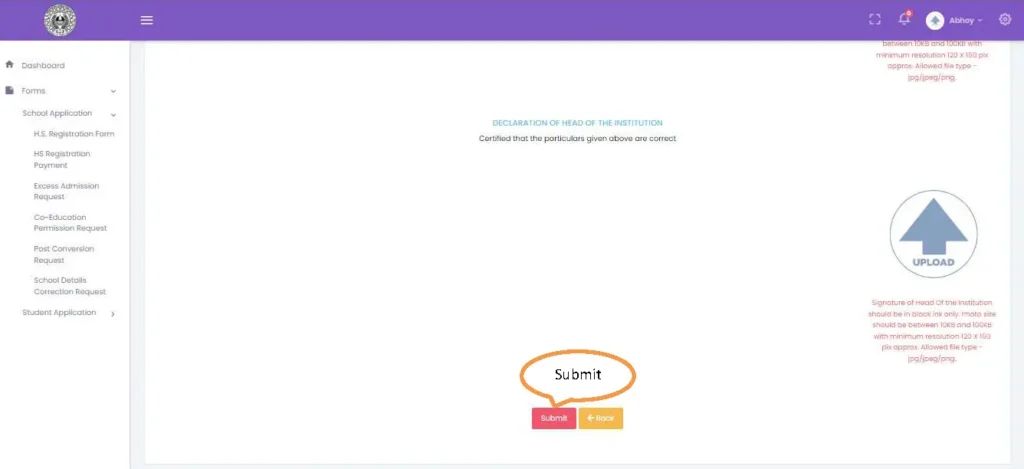
after submitting the form control moves automatically to the list view page.
Step4. User can view the registration form from the list view page to check the prefilled form.
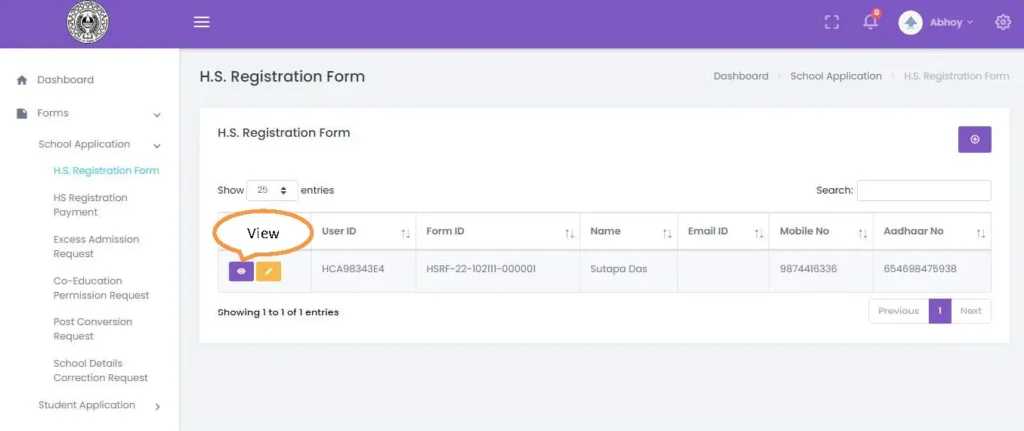
Step5. User can edit the registration form from the list view page to update the prefilled form
1.3 Registration form payment
Description: User wants to make payment for registration forms.
Step1. User Clicks on the HS Registration Payment. Its redirects the user to the following page
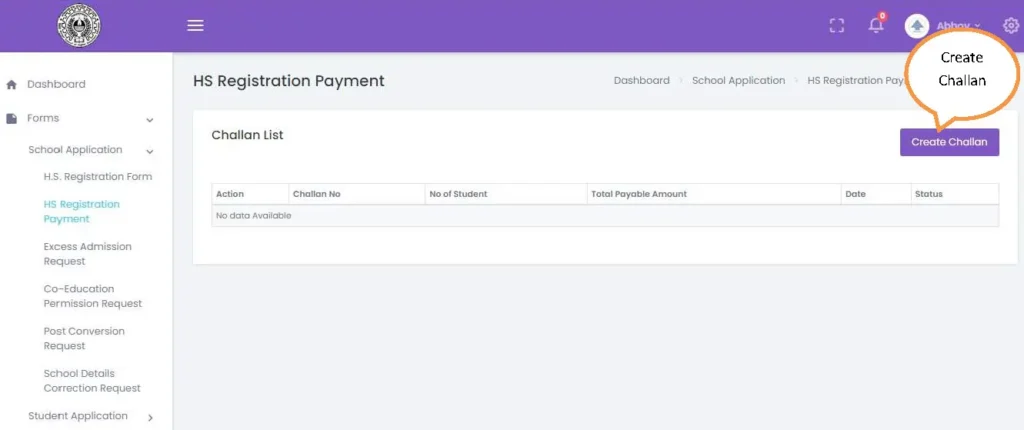
Step2. To pay registration fees user have to create challan first. User clicks on the Create Challan button on the top right corner and redirects to the following page:
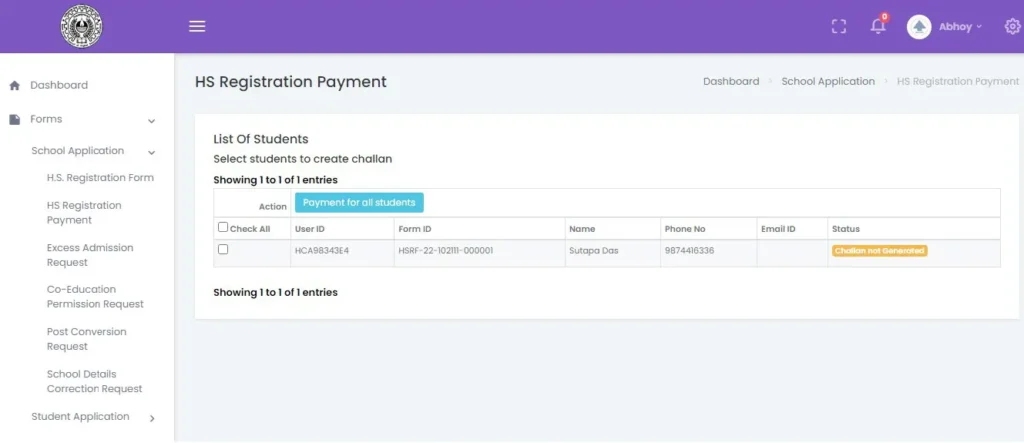
Step3. User selects multiple students by clicking on the checkboxes beside each row and clicks on the Payment for Selected Students button.
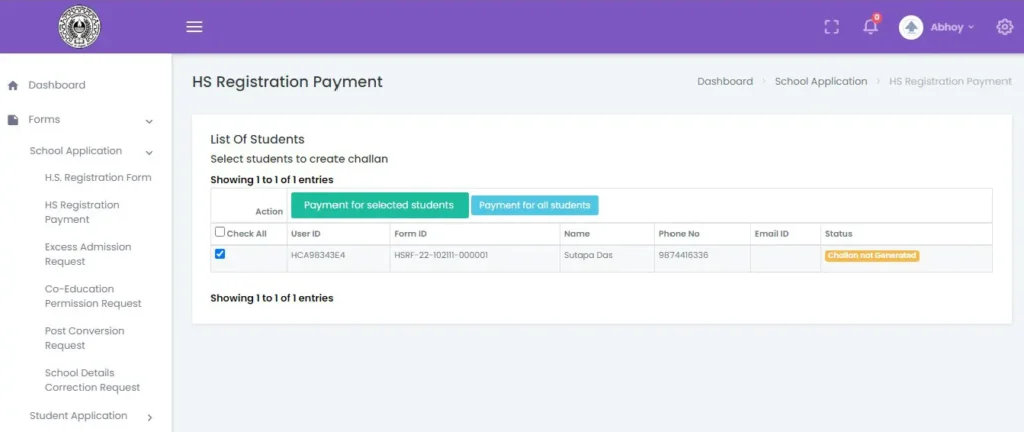
User can also make payment for all student by clicking on the Payment for all Students button
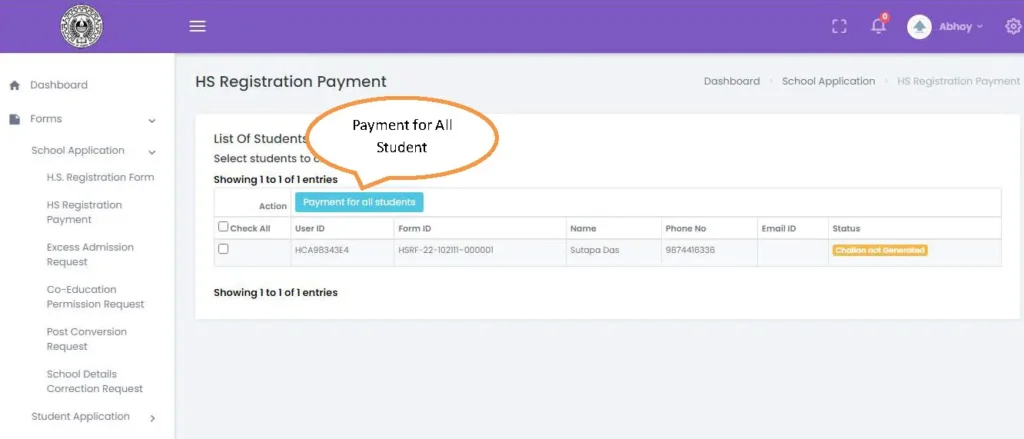
Step4. Confirmation popup will come to ensure the challan creation and challan will get generated.
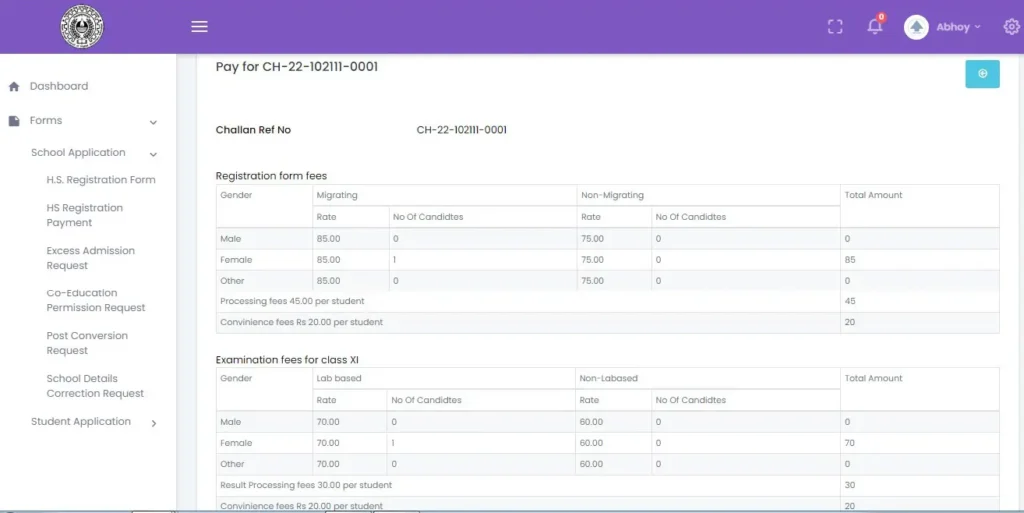
Step5. To pay this challan clicks on the Pay Now button at bottom right corner and redirects to the payment page.
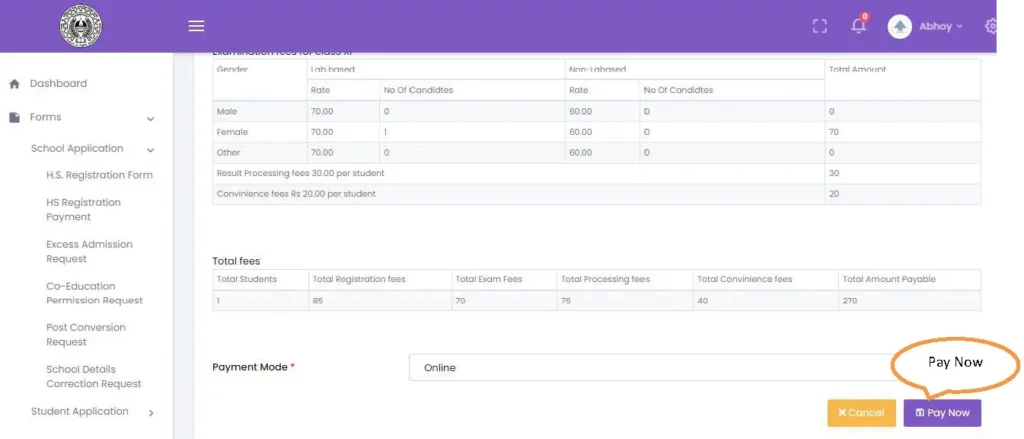
1.4 Fill Continuing Student form
Description: User needs to fill a failed student form or edit/delete an already filled form.
Step1. User Sign in into the portal using his login credential received through mail and clicks on the link Form-> Continuing Student-> Add Students.
Step2.
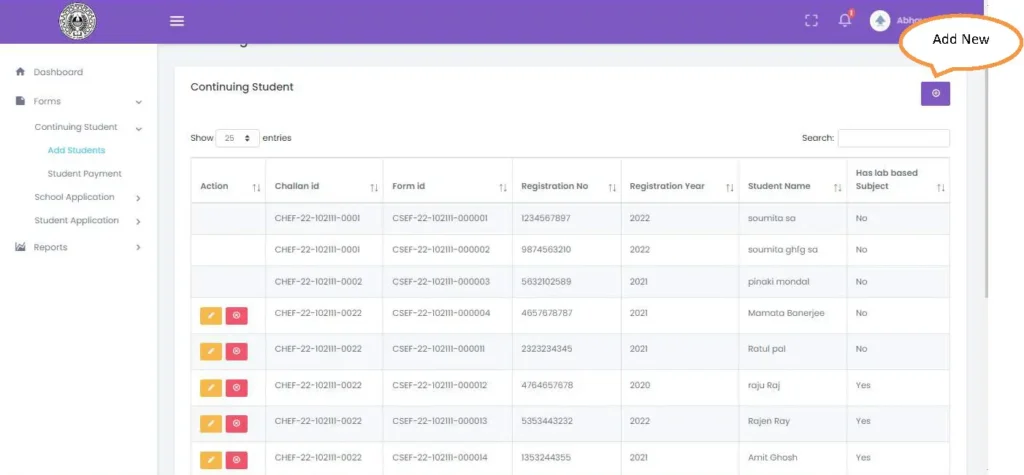
List of class XI Failed student shows.
Step3. Clicks on the Add New button and a new form will open.
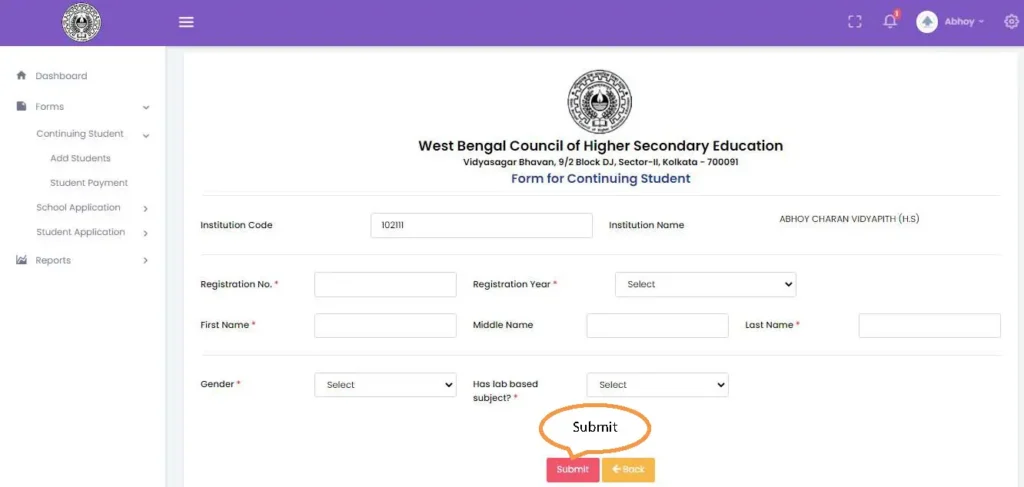
fill the form and submit the form by clicking Submit button at the bottom of the form. After submitting the form, control moves automatically to the list view page.
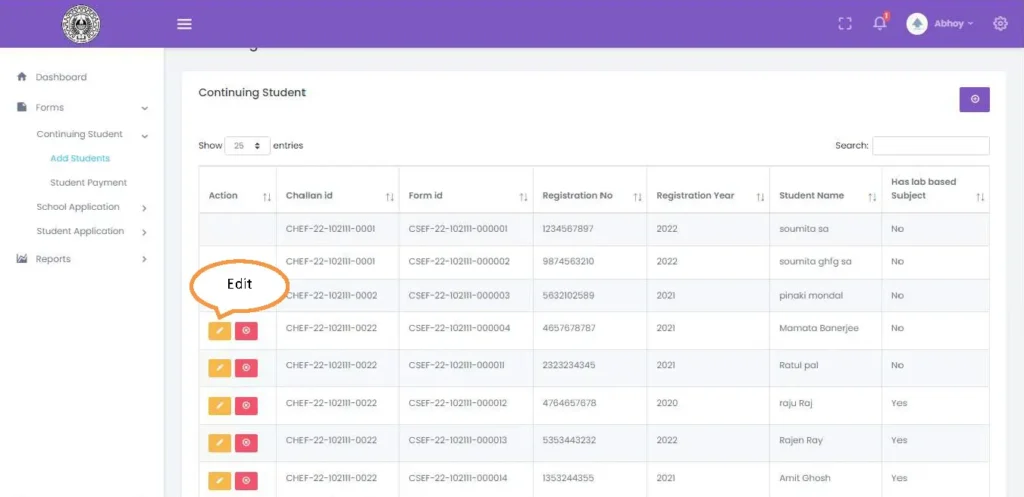
Step4. User can edit the failed student form from the list view page to update the prefilled form.
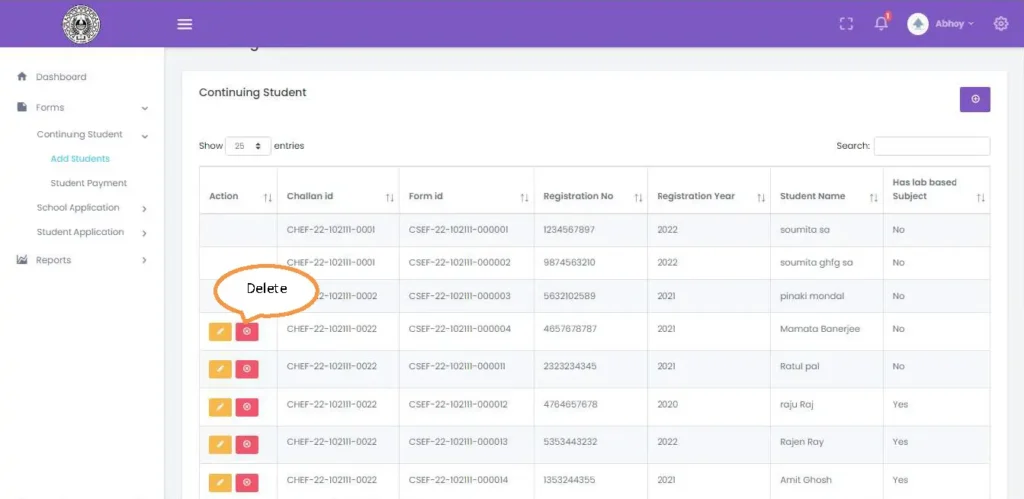
Step5. User can delete any failed student by clicking on the delete button.
1.3 Continuing Student payment
Description: User wants to make payment for class XI failed student.
Step1. User Clicks on the Form-> Continuing Student->Student Payment. Its redirects the user to the following page where user can view all paid /unpaid challan list. All paid challan shows Money receiptin Action column and unpaid challan shows view and delete challan option
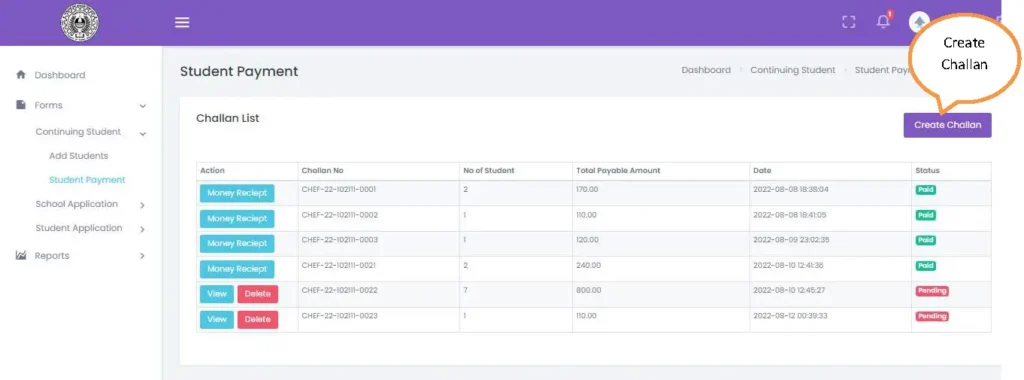
Step2. To pay fees for class XI failed student, user have to create challan first. User clicks on the Create Challan button on the top right corner and redirects to the following page:

Step3. User selects multiple students by clicking on the checkboxes beside each row and clicks on the Payment for Selected Students button.

User can also make payment for all student by clicking on the Payment for all Students button

Step4. Confirmation popup will come to ensure the challan creation and challan will get generated.
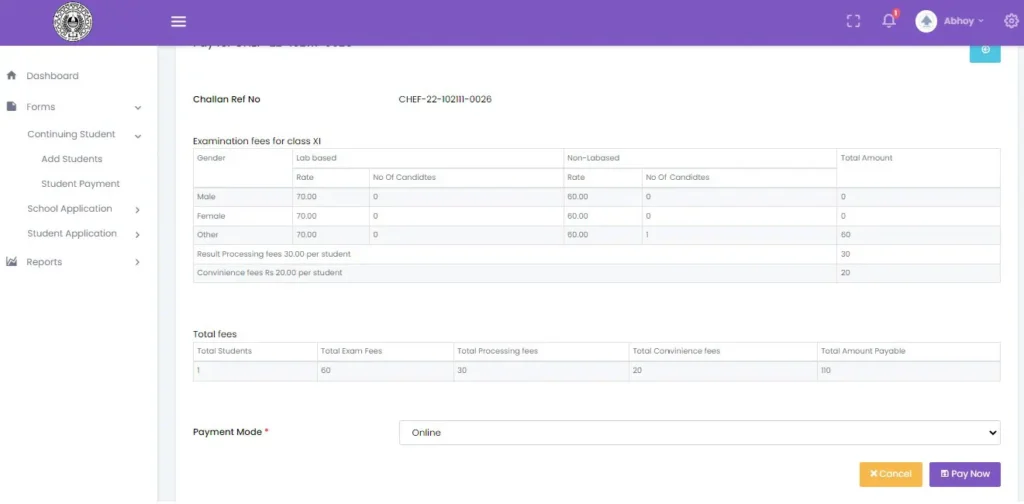
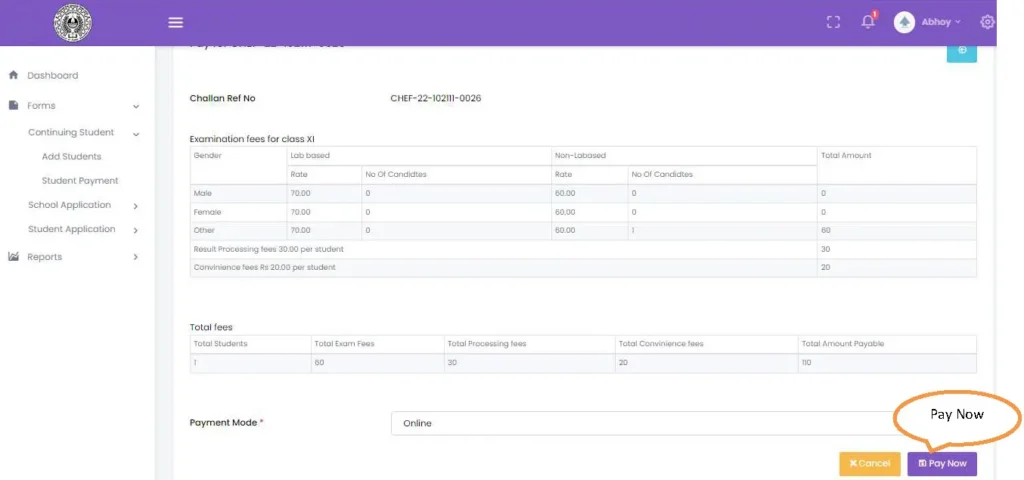
Step5. To pay this challan clicks on the Pay Now button at bottom right corner and redirects to the payment page.
